


Let’s Bake a Delightful Oreo 6-Inch Mini Cake!
Hey there, dessert lovers! 🍰 If you’ve been craving a cute, creamy, and super chocolatey treat that’s easy to make (even if you’re new to baking), you’re in the right place. Today, I’m sharing my go-to recipe for this adorable 6-inch Oreo mini cake—perfect for parties, date nights, or just satisfying that sweet tooth on a lazy afternoon. Let’s dive into the magic of mixing Oreo goodness with a fluffy cake base!
Ingredients You’ll Need (No Fancy Tools Required!)
First things first: Let’s gather all the ingredients. This recipe uses common pantry staples, so you probably already have most of them. Here’s what you need:
- For the cake batter:
– 6 large eggs (room temperature works best—trust me, it makes folding easier!)
– 100g low-gluten flour (sifted, to avoid lumps—this is key for a smooth texture!)
– 72g vegetable oil (or sunflower oil, whatever you have!)
– 72g whole milk (dairy or oat milk works, but I prefer dairy for creaminess)
– 55g granulated sugar (split between egg whites and cream later!)
– 3-5 drops of lemon juice (helps stabilize egg whites for fluffy peaks)
– 5g Valrhona cocoa powder (sifted, for that rich chocolatey flavor—you can sub with regular cocoa, but Valrhona is worth it!)
- For the cream filling & decoration:
– 300g Blue Windmill fresh cream (or heavy cream if you can’t find Blue Windmill—just make sure it’s cold!)
– 30g granulated sugar (to sweeten the cream—adjust to taste!)
– 2 packs of Oreo cookies (crushed for filling or kept whole for topping—your call!)
Pro tip: This recipe is designed for a 6-inch non-stick square rainbow cake mold from Xuechu (super handy for even baking!), but any 6-inch non-stick pan works. Just adjust the baking time if using a different size!
Step-by-Step Baking Guide (With Cute Visuals!)
Let’s get hands-on! I’ll walk you through each step with tips to avoid common mistakes. Don’t worry if you’re a newbie—this is beginner-friendly, promise!
Step 1: Prep your ingredients
First, take out all your ingredients and let them sit at room temperature for 30 minutes. Eggs, milk, and oil at room temp mix better, which means a smoother batter. If you’re in a hurry, pop eggs in warm water for 5 minutes—no biggie! 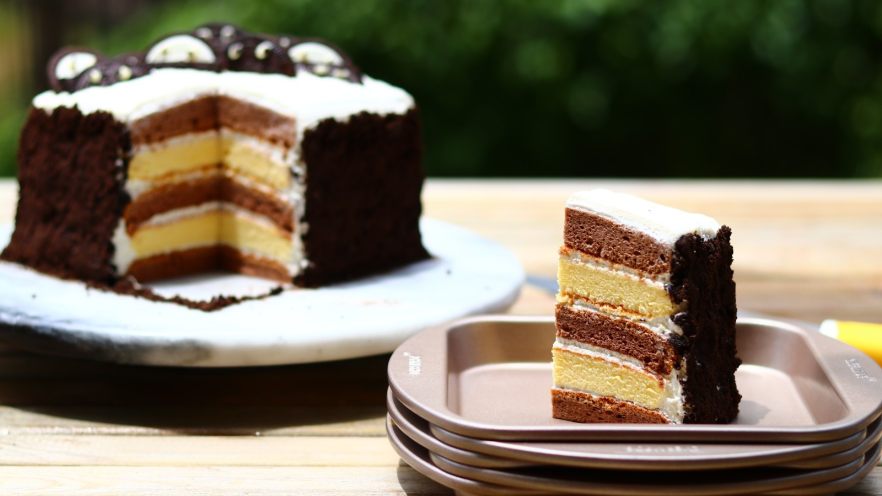
Step 2: Mix the wet base
In a large bowl, pour the 72g oil and 72g milk. Whisk them together until they’re fully emulsified—you’ll see a nice, smooth mixture with no separation. Think of it like a mini salad dressing! 
Step 3: Add the egg yolks
Crack the eggs into a separate bowl, scoop out the yolks, and add them to the oil-mixture. Whisk like crazy until everything is combined—your batter should look pale yellow and creamy. Pro move: Use a whisk or electric mixer on low for 1 minute—no need for over-whisking! 
Step 4: Sift the flour
Now, sift the 100g low-gluten flour into the batter. Sifting is your secret weapon here—it removes lumps and gives the cake a light, airy texture. Gently stir with a spatula until there are zero flour clumps left.  Wait, no—correct step 4 image:
Step 5: Split the batter for color
Here’s where we get that cute chocolate-original color contrast! Take 5/8 of the plain batter and set it aside in a separate bowl. To the remaining 3/8, add the 5g sifted cocoa powder. Whisk until the cocoa is fully dissolved—no gritty bits allowed! 
Step 6: Whip the egg whites
In a clean, dry bowl, beat the egg whites with the 55g sugar and 3-5 drops of lemon juice. Beat on high until you get stiff, glossy peaks—like, when you lift the whisk, the peaks stand straight up without bending. That’s the sweet spot! 
Step 7: Fold egg whites into batter
Now, split the stiff egg whites into two equal parts. Take 1/2 of the egg whites and gently fold into the plain batter (using a spatula, cut and fold motion—don’t stir!). Then take the other 1/2 and fold into the cocoa batter. Mix until just combined—over-mixing is the enemy of fluffy cake! 
Step 8: Layer the batter in the mold
Pour the plain batter into the bottom of the 6-inch mold first, then spoon the cocoa batter on top. I like to alternate layers: 3 cocoa + 2 plain for that pretty color block look. Tap the mold on the counter a few times to release air bubbles—no more holes in your cake! 
Step 9: Bake time!
Preheat your oven to 150°C (302°F). If you have a small oven (like my 38L Dongling Kube), bake in batches: I put 1 mold on the bottom rack, then a cooling rack on top, and stack 4 molds on the rack. Large ovens can do all at once! Bake for 25 minutes. 
Step 10: Cool & release
When the timer dings, take the cake out and let it cool for 5 minutes. Then invert it onto a cooling rack and let it cool completely—this prevents the cake from crumbling when you try to frost it. Patience, friends! 
Step 11: Whip the cream
In a chilled bowl, add 300g cream and 30g sugar. Beat on high until it’s thick enough to hold peaks—about 8-9 stiff. You don’t need it rock-hard, but it should stand up when you tip the bowl. If it’s too runny, pop it in the fridge for 5 minutes and beat again! 
Step 12: Assemble & decorate
Slice the cooled cake into 3 layers. Spread a thick layer of cream on the first layer, add a handful of crushed Oreos, then stack the next layer. Repeat until all layers are stacked. Finally, spread cream on the sides and top, then press Oreo pieces gently onto the surface. Crushed Oreos in the cream? Even better! 
Final look!
Ta-da! Your adorable Oreo 6-inch mini cake is ready to be devoured. It’s perfect for tea time, birthdays, or even just a solo treat. I swear, the Oreo crumbs on top make it 10x cuter. 
Pro Tips for Glorious Results
Let me share my best hacks to avoid rookie mistakes:
1. Oven Issues: Every oven is quirky! If your cake browns too fast, cover the top with foil for the last few minutes. For my Dongling Kube, 150°C works, but if yours runs hot, try 140°C.
2. No Lumps Allowed: Sift flour AND cocoa powder—trust me, it’s the difference between a smooth cake and a gritty mess.
3. Folding Technique: Stirring egg whites kills air bubbles! Always use a gentle “cut and fold” motion—like you’re folding a napkin, not stirring soup.
4. Cream Fix: If your cream is too runny, add a splash of cold cream and chill the bowl for 5 minutes. Beat again, and it’ll thicken!
5. Mold Matters: If you use a non-stick mold, skip greasing. For regular pans, grease lightly with butter and dust with flour.
6. Cooling Time: Don’t rush! Let the cake cool completely (at least 1 hour) before slicing—this keeps the layers intact.
7. Oreo Substitute: If you’re out of Oreos, use digestive biscuits or chocolate wafers. Still yummy, promise!
Final Thoughts
This Oreo 6-inch mini cake is all about simplicity and fun. Baking is less about perfection and more about enjoying the process, right? Even if your first try isn’t picture-perfect, keep going—you’ll get better with every batch. Tag me on Instagram if you make this—@[YourName] would love to see your creation! Happy baking, and enjoy every bite! 🍪✨

")


")


 Recipe")