


Why You Need This Nutty Bread Bowl in Your Life
Okay, let’s be real: who doesn’t love a good bread bowl? Whether you’re stuffing it with soup, cheese, or nuts, there’s something inherently satisfying about eating from a bowl that’s made from bread. And let me tell you—this nutty bread bowl recipe is next-level awesome. It’s soft on the inside, sturdy on the outside, and packed with crunchy nuts and melty cheese. I’ve made this a dozen times now, and it’s always a hit, whether I’m serving it as a party appetizer or a lazy Sunday snack. Trust me, once you try it, you’ll wonder how you ever lived without it!
What makes this recipe special? Well, first off, it’s so customizable. You can swap out nuts for veggies, add different cheeses, or even stuff it with leftover chicken and gravy. But today, we’re going classic: nuts and cheese. It’s a match made in heaven—crunchy nuts, creamy cheese, and a bread base that holds everything together without getting soggy. Plus, making your own bread bowl is way cheaper than buying those fancy ones at the store. Let’s dive in!
Ingredients You’ll Need (No Fuss, Just Yums!)
Let’s start with the basics. I’ll list everything you need, with a little pro tip for each ingredient so you don’t mess it up. Pro tip: measure your ingredients carefully—baking is all about precision, but don’t stress too much; it’s forgiving!
- High-gluten flour: 240g – This is key! It gives the bread that stretchy, chewy texture. If you can’t find high-gluten, all-purpose flour works, but the bread might be a bit softer. Not bad, just different!
- Milk: 120g – Warm milk (about 35°C/95°F) makes the yeast happy. If you’re vegan, oat or almond milk works too—just check if the yeast is active first!
- Sugar: 30g – Adds a tiny sweetness and feeds the yeast. It helps the bread rise nicely without turning it into a candy bar.
- Egg: 1 whole – Binds the dough and keeps it moist. Skip it if you’re vegan, but the bread might be a bit drier.
- Salt: 2g – Enhances the flavors of the bread and dough. Don’t overdo it; a pinch goes a long way!
- Yeast: 3g – Active dry yeast is my go-to. Instant yeast works too, just adjust the amount slightly (and timing a bit). If your yeast is old, it might not rise—so check if it’s still active!
- Butter: 15g – Softened, not melted! Let it sit out for 10 minutes so it mixes smoothly. It adds richness and keeps the bread tender.
- Nuts of your choice: A handful (or two!) – I used walnuts, almonds, and cashews, but go wild with pecans, hazelnuts, or even peanuts. More nuts = more crunch = more happy!
- Shredded mozzarella cheese: A sprinkle – for that cheesy, melty goodness. You can use cheddar or parmesan too, but mozzarella stretches the best.
Step-by-Step Guide: From Dough to Delicious Bowl
Alright, let’s get our hands dirty! Baking bread can feel intimidating, but this recipe is beginner-friendly. I’ll walk you through each step with zero jargon—just good vibes and helpful tips. Let’s start!
Step 1: Mix the Dough (First, Gather Your Tools)

Okay, first, place all your ingredients in the bread machine in the order: sugar, salt, milk, egg, flour, then yeast. Why that order? Because sugar and salt can slow down yeast if they’re next to each other, so adding the wet ingredients first (milk, egg) creates a good environment for the yeast. Set the bread machine to “knead” for 20 minutes. If you don’t have a bread machine, mix by hand! Just use a dough hook or your hands for 10-15 minutes until the dough comes together.
Step 2: Add Butter for Tender Crust

After the first 10 minutes of kneading, the dough should look shaggy but starting to form a ball. Now, add the softened butter (make sure it’s not melted!). Let the kneading program run for the remaining 10 minutes. This is when the magic happens—fermentation of the dough. You’ll notice the dough becomes smoother and stretchier. If you’re kneading by hand, add the butter and knead for another 5 minutes. Trust me, this step is worth it!
Step 3: Perfect the Glove Membrane (The Secret to Good Bread)

Once kneading is done, take the dough out and check if it’s ready for the next step. Stretch a small piece between your fingers—if it forms a thin, elastic membrane that doesn’t tear, you’re good! If not, knead by hand for 3-5 minutes more. This “gluten development” ensures your bread will hold its shape when rising and stuffing.
Step 4: First Fermentation – Let It Rise!

Place the dough in a clean, oiled bowl. Cover with a damp cloth or plastic wrap and let it rise until it’s doubled in size. How to check? Press a finger into the dough—if it leaves an indent and doesn’t spring back, it’s done! This takes about 2 hours at room temp (around 25°C/77°F). If it’s cold, let it sit for 2.5 hours or use the oven method: preheat to 35°C, turn off, put the bowl inside with a pan of water for humidity. Done in 1 hour!
Step 5: Punch Down & Get Air Out

After the first rise, the dough is fluffy and light. Gently press down on it to release air bubbles—like deflating a balloon! This makes the bread dense and sturdy later. Knead for 1 minute by hand to smooth it out. Now, let it rest for 5 minutes before dividing.
Step 6: Divide the Dough (Size is Up to You!)

Divide the dough into 6 equal parts (or more if you want smaller bowls!). Use a sharp knife or bench scraper to cut. Each piece should be about 120-150g. I like 6 because they’re big enough to stuff but not too heavy to hold. Pro tip: weigh the dough for even portions, but if you’re lazy, just eye it—they’ll still turn out great!
Step 7: Second Fermentation – Puff Up!

Roll each dough ball into a smooth sphere, place on a greased baking sheet, and cover. Let them rise again until they’re 2.5 times bigger (about 45-60 minutes). The second rise is crucial for that fluffy, pillowy texture. If they’re ready, they’ll feel light and springy when you touch them.
Step 8: Preheat Oven & Bake the Bases

Preheat your oven to 170°C (340°F) for 5 minutes. While it heats, spray the inside of the oven with water (or on the bread surface) to create steam—this makes the crust crispy. Place the dough in the oven and bake for 20 minutes. The bread should be golden brown. If it’s pale after 20 minutes, bake 5 more minutes at 180°C. Let them cool on a rack for 1 hour.
Step 9: Cool, Then Hollow Out!

Once cooled, slice off the top third of each bread bowl (save the top for snacks!). Use a spoon to scoop out the soft inner bread, leaving a 1-2cm thick shell. Be gentle so the walls don’t tear. The goal is a sturdy bowl that holds fillings without collapsing.
Step 10: Stuff Your Bread Bowl!

Now, the fun part! Fill your hollow bread bowl with nuts and cheese. I mixed walnuts, almonds, and cashews, then added a sprinkle of mozzarella. You can go crazy: leftover chicken, veggies, cheese dip, or even soup. The more filling, the better—just don’t overstuff!
Step 11: Final Bake to Melt the Cheese

Preheat oven to 190°C (375°F) for the top heat. Spritz some water in the oven, then pop the stuffed bowls in for 6 minutes. Keep an eye on it—cheese melts fast! When it’s golden and bubbly, take it out. Let it cool 5 minutes before serving.
Step 12: Dig In & Enjoy!

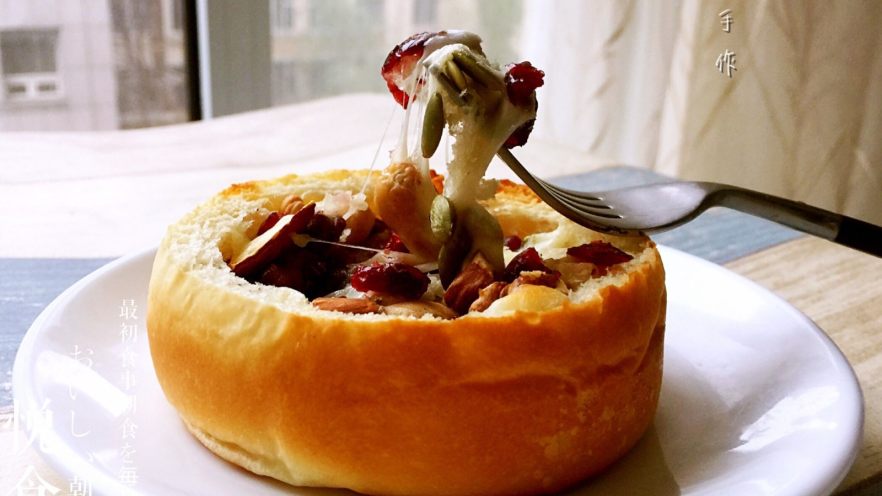
Time to eat! Grab a spoon and dig into your creation. The crust is crispy, the bread is soft, and the cheese/nuts are perfectly seasoned. This is so much better than store-bought—you’ll taste the love in every bite. Pro tip: serve with a side of soup for a cozy meal!
Step 13: Close-Up Perfection

Look at that! The cheese is all melted and gooey, and the nuts are perfectly toasted. I love taking photos of this—people always ask where I got it from, but it’s so easy to make at home. You can even repurpose leftover bread as croutons later!
Step 14: Show It Off

Another angle for the gram! The hollow shape is perfect for stuffing, and the nuts add that extra pop of color. This bread bowl makes for a showstopper at parties—people will be impressed you made it yourself!
Step 15: Top View Magic

Look at all that nutty goodness! You can really see the texture of the bread here—sturdy but soft. This is the kind of dish you’ll want to make again and again. Maybe try different nut combinations next time, like pecans and raisins for a sweeter twist?
Step 16: The Final Presentation

Here’s the bowl before baking—all ready to go! The cheese and nuts are sprinkled inside, and the top is cut off, waiting to be baked again. This is when you’ll smell the magic happening in the oven—nutty, cheesy, and slightly sweet. It’s like Christmas in a bowl!
Step 17: Ready to Eat

And finally, the finished product! This is how I serve it at parties—cut in half, filled with soup, and passed around. It’s mess-free, tasty, and impresses everyone. You can’t go wrong with this recipe, even if you’re a bread newbie!
Pro Tips to Avoid Common Mistakes
Let’s troubleshoot some issues you might face. These tips will save you time and heartache!
- Yeast Not Rising? Check if your yeast is active: mix it with warm water and sugar, and if it foams, it’s good. If not, start over with fresh yeast!
- Dough Too Sticky? Add a tablespoon of flour at a time while kneading. Too dry? Add a splash of milk. Balance is key!
- Bread Bowls Collapsing? Make sure the walls are thick enough (1-2cm) and don’t overstuff. The second rise is critical for volume.
- Cheese Not Melting? Add more cheese and use a higher oven temp (190°C). Spray water to keep the bread moist while baking!
- Make Ahead: Bake the bread bowls 2 days ahead, stuff them the next day. They’ll taste even better with time! Just reheat at 160°C for 5 minutes.
Final Thoughts: Why This Recipe is a Must-Try
Okay, I’ve rambled enough, but seriously—this nutty bread bowl is a game-changer. It’s perfect for any occasion: lazy weekends, dinner parties, or even just satisfying a late-night snack craving. You can stuff it with anything, and it’ll always be delicious. The best part? It’s easy to customize—swap nuts, try different cheeses, or add veggies. The dough is forgiving, and the end result is always impressive.
So, what are you waiting for? Grab your ingredients, preheat your oven, and make this bread bowl. I promise you’ll love it. Tag me when you make it—I’d love to see your creations! Happy baking, and enjoy every crunchy, cheesy bite!
nutty bread bowl recipe,homemade bread bowl,stuffed bread bowl,how to make nut bread bowl,best bread bowl for stuffing,easy bread bowl recipe,cheese and nut bread bowl,bread bowl appetizer,party snack bread bowl,homemade nut bread bowl


")


