

 & Red Dates Pork Bone Soup Recipe | Nourishing Chinese Wellness Dish")


Why Whole Wheat Bread Is My Go-To Healthy Snack (And Why It Should Be Yours Too!)
Let’s be real—finding a snack that’s filling, tasty, and doesn’t make you feel guilty later is like hitting the jackpot. For me, that jackpot is whole wheat bread. It’s not just some “health trend” food; it’s the real deal. Packed with fiber, it keeps me full for hours (no more 3 PM vending machine runs!), and since it’s made with whole grains, it’s way more nutritious than white bread. Plus, if you’re trying to watch your weight? Whole wheat bread is your BFF. It’s satisfying without loading you up on empty calories. Trust me, once you make your own, you’ll never go back to store-bought!
Ingredients You’ll Need for Homemade Whole Wheat Bread
Before we dive into the steps, let’s round up all the stuff you’ll need. Don’t worry, it’s nothing fancy—most of these are pantry staples:
- 300g whole wheat flour
- 30g butter (unsalted works best, but salted is okay if that’s what you have)
- 35g granulated sugar (just a touch for flavor and to feed the yeast)
- 1 large egg
- 120ml formula milk or regular milk (dairy or plant-based—your call!)
- 1.5g to 3g salt (start with 1.5g if you’re new, adjust to taste)
- 3g active dry yeast
- 20g warm water (not too hot—you don’t want to kill the yeast!)
Step-by-Step Guide to Making Fluffy Whole Wheat Bread
Okay, let’s get baking! I’ll walk you through each step with tips I’ve learned the hard way (yes, there was a time I messed up the yeast… oops).
Step 1: Gather All Your Ingredients

First things first—lay out all your ingredients on the counter. There’s nothing worse than realizing you’re missing sugar halfway through mixing. Pro tip: Measure everything out before you start. It makes the process so much smoother!
Step 2: Activate the Yeast

Take your 20g of warm water (it should feel like a warm bath—about 105°F/40°C) and stir in the 3g of dry yeast. Let it sit for 5 to 10 minutes. You’ll know it’s ready when it gets foamy on top. If it doesn’t foam? Toss it and try again—dead yeast means no rise, and no rise means flat bread. Bummer.
Step 3: Mix the Dry and Wet Ingredients (But Watch the Sugar and Yeast!)

Get a big mixing bowl. Add the whole wheat flour, sugar, egg, salt, and milk. Now, here’s a crucial tip: Pour the yeast water on one side of the bowl and the sugar on the opposite side. Why? Sugar can kill yeast if they touch directly. I learned this the hard way once—my bread didn’t rise at all. Don’t make my mistake!
Now, mix everything together until it forms a rough dough. It might be a bit sticky at first—don’t panic, that’s normal.
Step 4: Knead the Dough (Arm Day, Here We Come!)

Flour your countertop lightly and dump the dough out. Now, it’s time to knead. Fold the dough over itself, push it down with the heel of your hand, turn it a quarter turn, and repeat. Do this for about 15 minutes. How do you know when it’s ready? Try to stretch a small piece of dough—if it forms a thin film that has small, ragged holes, you’re good to go for now.
Step 5: Add Butter (The “Messy” Part)

Cut the butter into small pieces and add it to the dough. Now, knead again. Warning: The first few minutes will be a disaster. The butter will melt and make the dough slippery, and it’ll feel like it’s never going to come together. Just keep going—promise it gets better! After about 15 minutes, the butter will fully mix in, and the dough will become smooth and elastic. It’s like magic!
Step 6: Check the Gluten Development (The Window Pane Test)

Take a small piece of dough and gently stretch it. If it forms a thin, translucent “window pane” without tearing (or only tears in a small, smooth hole), you’re done kneading! If not, keep kneading for a few more minutes. This step is key for fluffy bread—don’t skip it.
Step 7: Let the Dough Rise (Patience Is Key)

Put the dough back into the mixing bowl (make sure it’s clean!) and cover it with a damp kitchen towel. Let it sit in a warm spot (like your oven with the light on) for about 1 to 1.5 hours, or until it doubles in size. How to check? Poke it with your finger—if the indentation stays, it’s ready. If it springs back, give it a little more time.
Step 8: Punch Down the Dough (Stress Relief, Anyone?)

Once the dough has risen, take it out and punch it down. This releases all the air bubbles and helps the bread have a uniform texture. It’s also super satisfying—go ahead, give it a good punch!
Step 9: Divide and Rest the Dough

Divide the dough into 4 equal pieces. Shape each piece into a ball and let them rest on the counter for 15 minutes, covered with the damp towel. This relaxes the gluten, making it easier to shape later.
Step 10: Shape the Dough into Loaves

Take one dough ball and flatten it into a rectangle (like a tongue shape—hence the “tongue-shaped” tip!). Then, roll it up tightly from one end to the other. Pinch the seam closed and place it seam-side down on a baking sheet lined with parchment paper. Repeat with the other pieces.
Step 11: Second Rise (Yes, We Need Another One!)

Cover the shaped dough with the damp towel again and let it rise for another 30 to 45 minutes, or until it doubles in size. This is when the bread gets its fluffy texture, so don’t rush it!
Step 12: Score and Bake (Almost There!)

Preheat your oven to 150°C (300°F) while the dough is rising. Once it’s ready, take a sharp knife and make 2 shallow slashes on top of each loaf. You can also sprinkle a little flour or sugar on top for a nice look. Then, pop it in the oven!
Step 13: Bake Until Golden Brown

Bake for about 20 minutes. But here’s a heads up: Every oven is different! My oven runs hot, so I usually check it at 18 minutes. How do you know it’s done? The bread should sound hollow when you tap the bottom, and it should be a nice golden brown color. If it’s still pale, give it a few more minutes.
Step 14: Cool and Enjoy!

Take the bread out of the oven and let it cool on a wire rack for at least 10 minutes before slicing. I know it’s tempting to dig in right away, but cutting it too soon will make it soggy. Trust me, the wait is worth it!
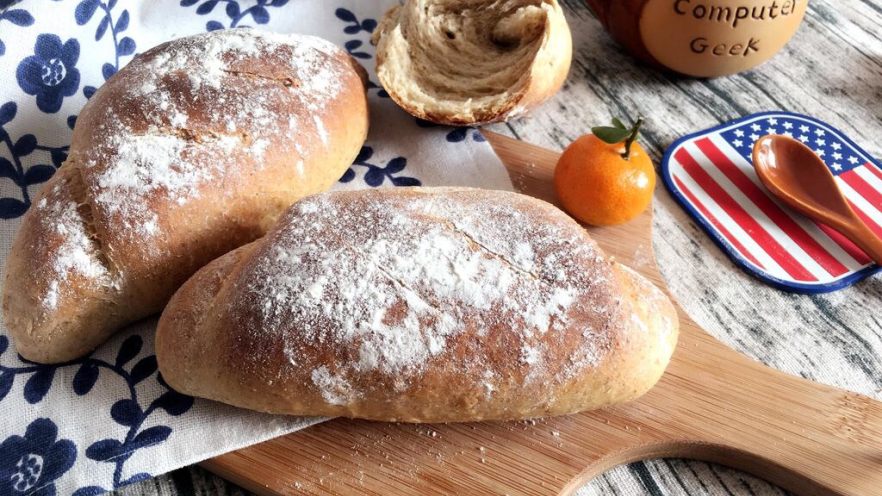
Step 15: Dig In (You Deserve It!)

Once it’s cool, slice it up and enjoy! This whole wheat bread is so soft and fragrant—you’ll be shocked it’s homemade. Spread some butter on it, make a sandwich, or just eat it plain. It’s perfect any way you like it!
Final Thoughts on Homemade Whole Wheat Bread
Making whole wheat bread at home might seem intimidating at first, but once you get the hang of it, it’s actually pretty easy. The key is to be patient with the rising times and not skip the kneading steps. And hey, even if your first loaf isn’t perfect? That’s okay! Practice makes perfect. I’ve had my share of dense loaves and flat disasters, but now? I make this bread every week.
So, what are you waiting for? Grab your ingredients and give this recipe a try. Your taste buds (and your body) will thank you!


 Recipe – Tried & True!")


")