

 & Red Dates Pork Bone Soup Recipe | Nourishing Chinese Wellness Dish")

")
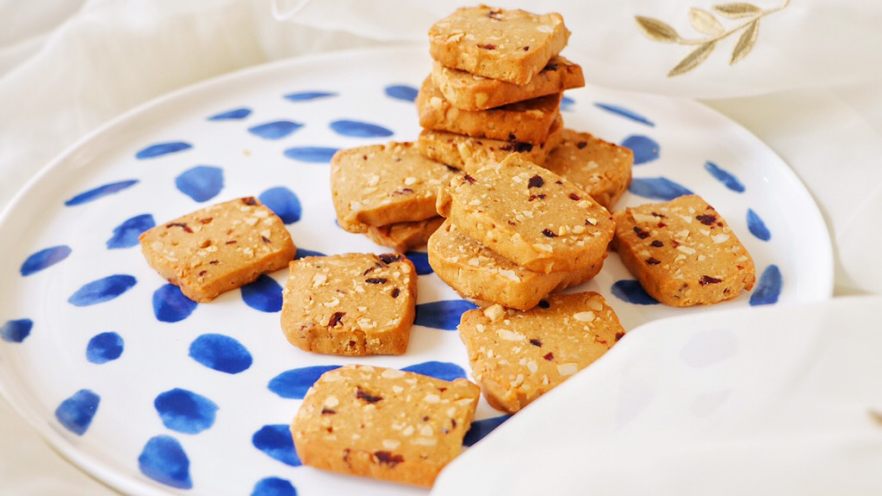
How to Make Irresistible Brown Sugar Peanut Cookies (Crispy & Nutty Recipe)
Okay, let’s be real—brown sugar cookies are the unsung heroes of the cookie jar. They’re not as cloyingly sweet as white sugar versions, and that deep, caramel-like flavor? Chef’s kiss. I’ve been obsessed with brown sugar treats forever—brown sugar walnut cookies, brown sugar peanut cookies… you name it. But here’s the tea: my walnuts went stale last week (thanks, humidity!), so I swapped ’em for peanuts. Spoiler: it was the best mistake ever. These brown sugar peanut cookies turned out so crispy, nutty, and perfectly sweet—you’re gonna want to make a double batch.
Why This Brown Sugar Peanut Cookie Recipe Works
First off, let’s talk about brown sugar. It’s not just “less sweet white sugar”—it has molasses, which gives those cookies that rich, warm flavor and a soft, chewy (wait, no—crispy in this case) texture. I’ve tried store-bought brown sugar peanut cookies before, and they’re usually either too crumbly or way too sweet. This recipe? It’s balanced. Plus, the peanuts add a crunchy contrast that makes every bite feel like a little celebration.
What You’ll Need for Brown Sugar Peanut Cookies
Let’s list out the ingredients—no fancy stuff, promise. I’ve noted a few swaps and tips here because, let’s be honest, we all have that one ingredient missing from the pantry:
- 160g all-purpose flour (wait, low-gluten? Yeah, that’s all-purpose for most of us—don’t overthink it)
- 75g brown sugar (pro tip: if you use super moist brown sugar from Amazon, cut back 5-10g—trust me, I learned the hard way)
- 80g peanuts (roasted, unsalted is best—we’ll toast ’em a little more for extra flavor)
- 25g dried cranberries (chopped—adds a tiny sweet-tart kick, but you can skip if you hate cranberries)
- 75g unsalted butter (room temp, not melted—we want that creamy texture)
- A pinch of salt (yes, even a tiny bit makes the sweetness pop)
- 2 egg yolks (or 1 whole egg, ~25g—egg yolks make these extra crispy, though!)
Wait, let’s pause on the brown sugar thing. I once bought a block of brown sugar from a random online shop, and it was so moist—my cookies turned out like caramel blobs. So if you’re using that super moist stuff, dial back the sugar. If you’re using regular bagged brown sugar from the grocery store, 75g is perfect.
Step-by-Step: Making Brown Sugar Peanut Cookies
Alright, let’s get baking! I’m breaking this down into super easy steps—no fancy mixer required (though a hand mixer helps). Let’s go:
1. Prep Your Ingredients First (Pro Move)
First, let’s get all the stuff ready. Baking is all about mise en place—trust me, you don’t want to be chopping peanuts while your butter melts into a puddle.
- Preheat your oven? Wait, no—save that for later. First, prep the peanuts: toast ’em in a pan over low heat for 5 minutes, then let ’em cool and rub off the skins. The skins are bitter, so ditching ’em makes the cookies taste way better.
- Chop the dried cranberries into small bits—if they’re too big, they’ll sink to the bottom of the cookie (and no one wants a cranberry-less cookie).
- Let your butter sit out at room temp for 30 minutes. It should be soft enough to press with your finger, but not melted. Summer hack: if it’s 90°F outside, 10 minutes is enough—don’t let it turn into a liquid mess.


2. Cream the Butter & Brown Sugar (The Flavor Base)
Okay, now the fun part. Grab a big bowl, add your room temp butter, and dump in the brown sugar. Use a spatula to mix it until there are no big sugar lumps—those lumps will make your cookies have random sweet spots (yuck).
Then, grab your hand mixer (or a whisk, if you’re feeling ambitious) and beat it on medium speed for 2-3 minutes. You want it to be light and fluffy—like, when you lift the mixer, it should form a little peak that doesn’t fall over. That’s how you get those crispy edges later!


3. Add the Egg Yolks (Crispy Secret Weapon)
Next, add the egg yolks one at a time. Beat for 30 seconds after each yolk—don’t just dump ’em all in at once. If you do, the mixture might curdle (and curdled cookie dough is sad). You want it to be smooth and pale yellow—like a fancy pastry cream, but less fancy.


4. Mix in the Dry Ingredients (No Overmixing!)
Now, grab your flour and that tiny pinch of salt. Sift ’em together into the bowl—sifting makes the flour lighter, so your cookies won’t be dense. Then, use a spatula to fold the flour into the butter mixture. Fold, don’t stir—stirring makes the gluten in the flour activate, and that’ll make your cookies chewy instead of crispy. Stop folding as soon as there are no white flour streaks left—overmixing is the enemy here.


5. Add the Peanuts & Cranberries (Nutty Goodness)
Time to add the star of the show: the peanuts! Dump in the toasted, skinned peanuts, and fold ’em in gently. Then add the chopped cranberries—again, fold gently. You don’t want to break the peanuts into tiny bits (crunchy peanut chunks = happy cookies).
Keep folding until the peanuts and cranberries are evenly distributed. The dough should be smooth and a little oily—if it’s too sticky, add a tiny bit more flour (like 5g at a time). If it’s too dry, add a splash of milk (1 tsp at a time).


6. Chill the Dough (The Most Important Step You’ll Skip If You’re Impatient)
Okay, here’s the thing: if you bake the dough right now, your cookies will spread too much and turn into flat, greasy disks. No one wants that. So wrap the dough in parchment paper, roll it into a log (about 5cm in diameter), and stick it in the freezer for 30 minutes. The freezer firms up the butter, so your cookies keep their shape in the oven.
I once skipped this step because I was hungry, and my cookies turned into a giant peanut sugar pancake. Learn from my mistakes—chill the dough!


7. Slice & Bake (The Rewarding Part)
Preheat your oven to 170°C (340°F) while the dough chills. Line a baking sheet with parchment paper (no greasing needed—parchment prevents sticking). When the dough is frozen solid, take it out of the freezer and slice it into 7mm thick rounds. Don’t make ’em too thick (they’ll be undercooked in the middle) or too thin (they’ll burn).
Arrange the slices on the baking sheet—leave a little space between each cookie (they’ll spread a tiny bit). Bake for 25 minutes. Wait, how do you know when they’re done? When they’re golden brown around the edges and you can hear a faint “sizzle” from the oven (that’s the butter caramelizing—yummy).


8. Cool & Enjoy (The Best Part)
Take the cookies out of the oven and let ’em cool on the baking sheet for 5 minutes—they’ll be soft when they come out, but they’ll crisp up as they cool. Then transfer ’em to a wire rack to cool completely. Trust me, don’t try to eat one right away—you’ll burn your tongue, and it won’t be crispy yet.
Once they’re cool, grab a cookie and take a bite. Chef’s kiss—the brown sugar caramel flavor, the crunchy peanuts, the tiny sweet-tart cranberry bits… it’s perfect. I ate three while writing this (oops).

Pro Tips & Swaps for Brown Sugar Peanut Cookies
Let’s wrap this up with some extra tips to make your cookies even better:
Peanut Swap: Walnuts or Almonds
If you don’t like peanuts (or your walnuts are fresh!), swap ’em for walnuts. Pro tip: you don’t need to toast walnuts—raw walnuts have a richer, nuttier flavor. Almonds work too—just toast ’em first (like the peanuts).
Make Ahead & Freeze
These cookies freeze great! After slicing the dough log, wrap the slices in parchment paper and freeze ’em in a zip-top bag. When you want fresh cookies, just pop a few slices on a baking sheet and bake for 25 minutes (no need to thaw).
Don’t Overbake
Overbaking makes these cookies hard and bitter. If they’re golden brown around the edges, they’re done—even if the middle looks a little soft. They’ll crisp up as they cool.
Final Thoughts (AKA, Why You Need to Make These Cookies)
Honestly, these brown sugar peanut cookies are my new go-to. They’re easy to make, use basic ingredients, and taste way better than store-bought. I brought a batch to work last week, and my coworker asked for the recipe twice. My roommate ate half the batch in one night (rude, but I get it).
So next time you’re craving a sweet treat that’s not too sweet, give these a try. You won’t regret it. And if you make ’em, tag me on Instagram— I’d love to see your crispy, nutty creations!


