


 – No Holes, Just Creamy Goodness")
Why Steamed Eggs Are the Ultimate Egg Hack (Science Backs It Up!)
Let’s be real—eggs are the unsung heroes of the kitchen. But have you ever stopped to think about how you cook them? I used to fry eggs every morning until I stumbled on a study that blew my mind: the way you cook eggs affects how much nutrition your body actually absorbs. Turns out, boiled or steamed eggs have a 100% absorption rate! Compare that to scrambled (97%), sunny-side up (92.5%), or—yikes—raw eggs (only 30-50%). No wonder Chinese households swear by steamed eggs as a go-to dish. It’s healthy, easy, and tastes like a warm hug in a bowl.
But here’s the catch: making silky, hole-free steamed eggs is trickier than it looks. I’ve had my share of failures—eggs that turned out rubbery, lumpy, or full of weird air pockets. After years of trial and error (and a lot of sad, holey eggs), I finally cracked the code. Today, I’m sharing my foolproof method so you can make restaurant-worthy steamed eggs at home. Let’s dive in!
What You’ll Need (Super Simple Ingredients, Promise)
You don’t need fancy tools or exotic ingredients for this. Just the basics:
- 1 large egg (60-70g—standard size, nothing special)
- 1 paper cup of warm water (175-190g—about 30-40°C; not too hot, not too cold)
- 1g salt (a tiny pinch—less is more here!)
- 3g sesame oil (for that extra aroma)
- A sprinkle of chopped chives or cilantro (optional, but adds a fresh kick)
Pro tip: If you don’t have a paper cup, a regular measuring cup works too. Just aim for about 1.5 to 2 times the volume of the egg.
Step-by-Step Guide to Silky Steamed Eggs (No Failures Allowed)
Let’s break this down into easy steps. Follow each one, and you’ll get that perfect creamy texture every time.
Step 1: Crack and Season the Egg

Take a clean bowl (no grease, please—grease can mess up the texture) and crack in your egg. Add that tiny pinch of salt. Remember: too much salt will overpower the egg’s natural flavor, so go light!
Step 2: Beat the Egg Like Your Life Depends On It

Grab a pair of chopsticks (or a fork, if you don’t have chopsticks) and beat the egg in one direction—up and down, fast and steady. You want the yolk and white to mix completely, no streaks left. This takes about 1-2 minutes. Don’t rush this part! Even mixing is key to a smooth texture.
Step 3: Prep the Warm Water (Critical Step!)

Warm water is non-negotiable here. If the water is too hot, it’ll cook the egg immediately and make lumps. If it’s cold, the egg won’t steam evenly. Test the water with your finger—it should feel slightly warm, like a baby’s bath. Perfect.
Step 4: Mix Water and Egg (Slowly!)

Pour the warm water into the beaten egg gradually, while stirring constantly. This prevents the egg from curdling. Keep stirring until the water and egg are fully combined—no separate layers allowed.
Step 5: Filter Out the Bubbles (Say Goodbye to Holes)

Here’s the secret to no holes: strain the egg mixture through a fine sieve. This gets rid of any foam or lumps that cause those annoying air pockets. Trust me, this step makes all the difference. Don’t skip it!
Step 6: Wipe Away Tiny Bubbles (Extra Perfection Step)

Even after straining, you might see a few tiny bubbles on the surface. Grab a piece of kitchen paper and gently dab them away, or use a small spoon to scoop them off. Every little bubble gone means a smoother final product.
Step 7: Seal the Bowl (No Steam Escape!)

Cover the bowl tightly with plastic wrap. Make sure it’s sealed all the way to the bottom—this keeps the steam from dripping onto the egg and making it watery. If you don’t have plastic wrap, a plate works too, but plastic wrap is more reliable.
Step 8: Steam It (But Don’t Forget the Gap!)

Put the bowl in a steamer (or a pot with a steamer rack) and turn the heat to high. Wait for the water to boil—then here’s another pro tip:
Step 9: Leave the Lid Ajar (No More Rubber Eggs)

Once the water is boiling, prop the lid open with a chopstick or a small spoon. This lets some steam escape, so the pressure doesn’t get too high. High pressure is what causes those ugly holes and rubbery texture. Trust me, this one trick fixed all my past failures!
Step 10: Steam for 15 Minutes (Set a Timer!)

Let it steam for about 15 minutes. The exact time might vary a little depending on your steamer, but 15 minutes is a safe bet. To check if it’s done, gently shake the bowl—if the center jiggles slightly, it’s perfect. If it’s still liquid, give it a minute more.
Step 11: Add the Finishing Touches

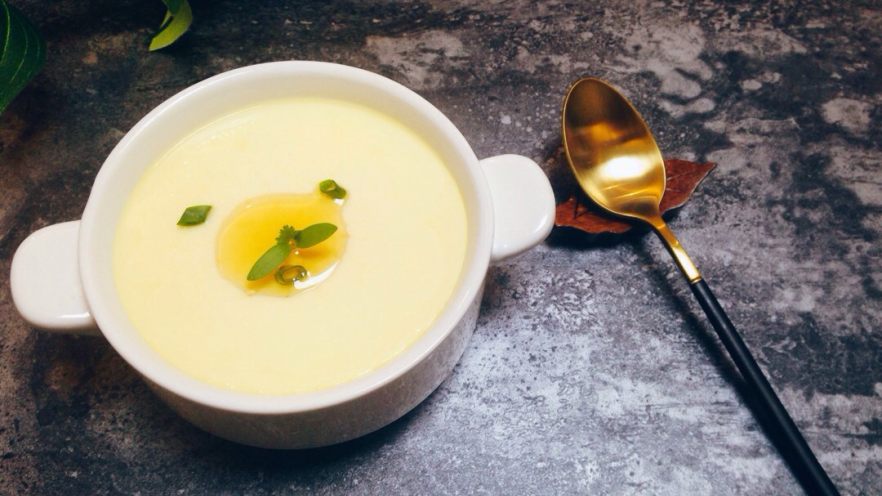
Take the bowl out (be careful—it’s hot!) and remove the plastic wrap. Drizzle a little sesame oil on top and sprinkle with chopped chives or cilantro. I love using fresh cilantro from my windowsill herb garden—it adds a bright, fresh flavor.
Step 12: Enjoy Your Perfect Steamed Egg!

And there you have it—silky, creamy steamed eggs that taste like they came from a fancy Chinese restaurant. I like to eat mine plain because the egg’s natural flavor is so good, but you can add soy sauce or chili oil if you want a little extra kick. Either way, it’s warm, comforting, and so satisfying.
My Top Tips for Steamed Egg Success (Don’t Skip These!)
I’ve made this dish so many times, I’ve learned all the little tricks to avoid mistakes. Here’s what you need to remember:
- Warm water only: Hot water will cook the egg, cold water will make it lumpy. Stick to 30-40°C.
- Less salt is better: You can always add more later, but you can’t take it out. Start with a tiny pinch.
- No extra seasonings: Wait until after steaming to add soy sauce or other flavors. Adding them early can break the texture.
- Leave the lid open: This is non-negotiable. It prevents pressure buildup and those annoying holes.
Final Thoughts: Why Steamed Eggs Are Worth the Effort
Steamed eggs might seem simple, but getting them right takes a little patience. But once you master this method, you’ll never go back to rubbery eggs again. It’s a healthy, quick meal that’s perfect for breakfast, lunch, or even a light dinner. Plus, it’s great for kids—my niece begs for it every time she visits!
So next time you’re craving something warm and comforting, give this steamed egg recipe a try. I promise you won’t be disappointed. And don’t forget to tag me if you make it—I’d love to see your perfect silky eggs!
 at Home: A Step-by-Step Guide with Pro Tips")


 – Easy Recipe for Soft, Chewy Treats")

: A Step-by-Step Guide with Tips")
")

