


")
Why Mini Light Cheesecakes Are My New Obsession
Let’s be real—cheesecake is great, but sometimes a giant slice feels like too much (or maybe that’s just me being greedy and wanting to save room for seconds?). That’s why I fell hard for mini light cheesecakes. They’re cute, portion-controlled, and way less intimidating to make than a full-sized one. Plus, since they’re “light,” I can pretend I’m being healthy… right? No judgment here.
What I love most about these little guys is how creamy and fluffy they are—nothing like those dense, heavy cheesecakes that leave you feeling stuffed. And the best part? If you can make a chiffon cake, you’ve basically got this down. No fancy skills required, just a few simple tricks to keep them from cracking (spoiler: temperature is everything). Let’s dive in!
Ingredients You’ll Need (For 6-8 Mini Cheesecakes)
First, let’s round up the goods. I’m all about simple, no-fuss ingredients—no weird additives or artificial flavors here. Just pure, delicious stuff:
- 3 large eggs (separated into yolks and whites—super important, don’t skip this!)
- 100g cream cheese (softened to room temp, trust me, this makes mixing way easier)
- 25g cake flour (low-gluten is key for that light texture)
- 50ml milk (any kind works, but whole milk adds extra creaminess)
- 30g unsalted butter (melted, not boiling hot)
- 35g powdered sugar (way better than granulated for smoothness)
Pro tip: Measure everything out before you start. There’s nothing worse than scrambling for flour while your cream cheese is melting. #beenthere
Step-by-Step Guide to Perfect Mini Light Cheesecakes
Okay, let’s get cooking! I’ve broken this down into super simple steps with pics to help you out. Follow along, and you’ll have perfect little cheesecakes in no time.
1. Prep Your Ingredients First

First things first: Get all your ingredients ready. Soften the cream cheese (leave it on the counter for 30 mins or pop it in the microwave for 10-second bursts—don’t overdo it!). Separate your eggs (make sure no yolk gets in the whites, or they won’t whip up right). And preheat your oven to 150°C (300°F) now—you don’t want to wait later!
2. Separate Egg Yolks and Whites

Grab two clean bowls—one for the yolks, one for the whites. Crack each egg gently and transfer the yolk back and forth between the two halves until the white drops into the first bowl. Set the yolks aside; we’ll use them in a minute.
3. Mix Cream Cheese and Egg Yolks

Take your softened cream cheese and pop it into a big bowl. Add the egg yolks one at a time—wait, no, wait! The recipe says three times, so split those 3 yolks into three parts? Wait, no, actually, just add one yolk, mix well, then another, then the third. That way, the cheese and yolks blend smoothly without lumps.

Use a hand mixer (or a whisk if you’re feeling strong) and mix along the sides of the bowl. This helps get rid of any clumps. You want the mixture to be super smooth—no lumpy cheese allowed!
4. Add Milk and Melted Butter

Pour in the milk and stir until it’s fully combined. The mixture might look a little runny now, but that’s okay.

Next, melt your butter (microwave for 20-30 seconds) and slowly pour it into the bowl while stirring. Keep mixing until everything is smooth and creamy. Yum, it’s starting to smell good already!
5. Sift in Cake Flour

Now, take your cake flour and sift it over the mixture. Sifting is non-negotiable here—it keeps the batter light and prevents lumps. Use a spatula to fold the flour in (don’t stir too hard, or you’ll deflate the batter). Just cut through the middle and fold the bottom up until there are no white streaks left.
6. Whip the Egg Whites (The Secret to No Cracks!)

Time for the fun part—whipping the egg whites! Take your clean bowl of egg whites and start beating them on low speed. When they get frothy (like beer foam), add the powdered sugar in three parts: a third now, a third when it starts to thicken, and the last third when it’s almost done.
Keep beating until the whites are “soft peaks”—that means when you lift the mixer, the peak bends over at the top. Don’t over-whip them into stiff peaks, or the cheesecake will be tough. Soft peaks are your friend here!
7. Fold the Egg Whites into the Batter

Take about a third of the whipped egg whites and stir them into the cheese batter. This lightens up the batter so the rest of the whites mix in easily. Then, add the remaining whites and fold them in gently—again, no stirring! You want to keep as much air as possible in the batter.


Keep folding until the batter is pale, fluffy, and uniform. No white streaks allowed!
8. Bake Using the Water Bath Method
Pour the batter into mini cheesecake molds (I use silicone ones—they’re easy to pop out!). Tap the molds on the counter a few times to get rid of any big air bubbles. Then, place the molds in a baking pan and pour warm water into the pan until it’s halfway up the sides of the molds. This is the water bath, and it’s what keeps the cheesecakes from cracking!

Pop the pan into the preheated oven and bake for 45 minutes at 150°C (300°F). Don’t open the oven door for the first 30 minutes—sudden temperature changes will cause cracks. I know it’s hard to wait, but trust me!
9. Cool and Enjoy

Once the timer goes off, turn off the oven and leave the door slightly ajar. Let the cheesecakes cool inside for 10-15 minutes—this prevents them from shrinking too much. Then, take them out and let them cool completely on a wire rack. They’ll shrink a little and pull away from the molds, which is normal.

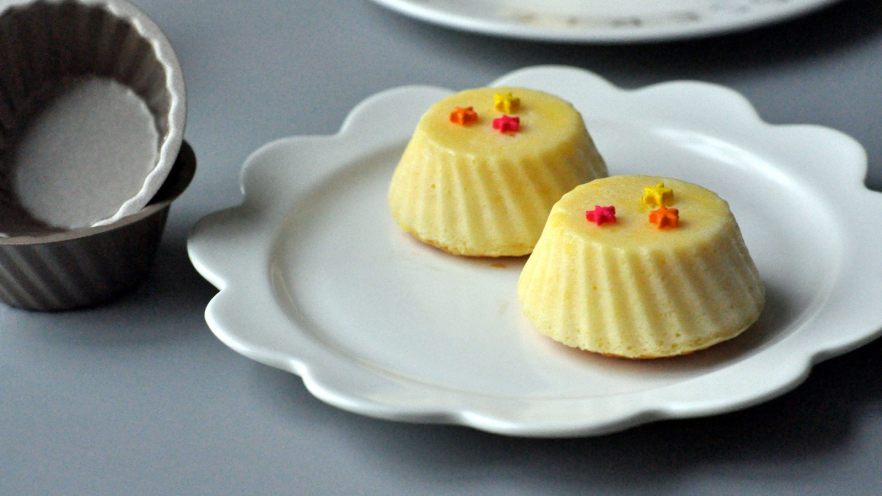
Now, the best part: Dig in! These mini cheesecakes are creamy, light, and melt in your mouth. They’re perfect for a afternoon tea, a party, or just a little treat for yourself. I like to top mine with fresh berries or a dollop of whipped cream, but they’re amazing on their own too.
My Top Tips for No-Fail Mini Light Cheesecakes
I’ve made my share of cracked, lumpy cheesecakes, so here are the tricks that finally made me a pro:
- Room temp ingredients: Cream cheese, eggs, and milk should all be at room temperature. Cold ingredients make the batter lumpy.
- Soft peaks only: Over-whipping the egg whites is the #1 cause of tough cheesecakes. Stop when the peak bends over.
- Water bath is key: This keeps the oven humid, so the cheesecakes cook evenly without cracking.
- Don’t rush cooling: Letting them cool slowly prevents shrinking and cracking. Patience, young grasshopper!
Final Thoughts
Mini light cheesecakes are such a fun, easy treat to make. They’re perfect for beginners (no fancy skills needed!) and taste way better than store-bought. Plus, since they’re mini, you can make a batch and share them with friends (or hoard them all for yourself—no judgment).
So grab your ingredients, preheat that oven, and let’s make some magic. Trust me, once you try these, you’ll be hooked. Happy baking!


")

 – A Classic Cantonese Home-Cooked Dish You Need to Try")
