

 & Red Dates Pork Bone Soup Recipe | Nourishing Chinese Wellness Dish")

 – Easy Homemade Recipe")
Let’s talk about steamed buns—those soft, pillowy clouds of goodness that make any breakfast or snack feel cozy. I used to make plain old steamed buns with just flour, water, yeast, and a pinch of sugar, like everyone else. They were okay, but nothing special. Then one day, I decided to swap water for milk on a whim… and wow, game changer! The milk adds this subtle, sweet creaminess that takes the texture from “meh” to “wait, did I just buy these from a bakery?” Now, whenever I make these milk steamed buns, I pair them with a warm bowl of congee and a little pickled veggies. One bite, and I’m full of energy for the day—total comfort food win!
Why You’ll Love These Milk Steamed Buns
First off, they’re so easy—no fancy tools or complicated steps. The milk trick is simple but makes such a difference in flavor and softness. Plus, they’re perfect for meal prep! Make a big batch, freeze them, and you’ve got quick breakfasts for weeks. And let’s be real—who doesn’t love a warm, fluffy bun that melts in your mouth? No more sad, dense store-bought buns for me!
Ingredients You’ll Need
Let’s keep it simple—no weird additives here. Just basic stuff you probably already have in your kitchen:
- 300g all-purpose flour (or medium-gluten flour—more on that later!)
- 150g warm milk (not too hot, or it’ll kill the yeast!)
- 15g sugar (adjustable for sweetness)
- 3g active dry yeast
Step-by-Step Instructions
Okay, let’s get to the fun part—making the buns! I’ve broken it down into super easy steps, so even if you’re a beginner, you’ve got this.
Step 1: Gather Your Ingredients

First, grab all your stuff: 300g flour, 15g sugar, 3g yeast, and 150g warm milk. Pro tip: Test the milk with your wrist—it should feel slightly warm, like a baby’s bottle. If it’s too hot, the yeast won’t work, and your buns will be flat. Not cool.
Step 2: Mix and Knead the Dough

Pour the flour and sugar into a big bowl and mix ’em up. Then, dissolve the yeast in a tiny bit of warm water (wait, the original said 10g? Oops, no—wait, the recipe says 150g milk total. Just mix the yeast into the warm milk directly, actually! Stir until the yeast dissolves, then pour it into the flour-sugar mix. Use chopsticks to stir everything into a shaggy mess, then roll up your sleeves and knead it into a smooth dough. This takes about 5-10 minutes—don’t skip this part! The smoother the dough, the softer your buns.
Step 3: Let the Dough Ferment

Cover the bowl with plastic wrap and let it sit in a warm spot. In summer, this takes about 1 hour—you’ll know it’s done when the dough doubles in size and has all those tiny honeycomb holes inside. Winter? It’ll take 2-3 hours, so be patient! To check if it’s ready, stick a floured finger into the dough—if the hole doesn’t spring back or collapse, you’re good to go.
Step 4: Punch Down and Shape the Dough

Take the dough out and give it a good punch—this gets rid of all the air bubbles. If you want chewy buns, knead it a little longer (I like mine extra chewy, so I knead for 2-3 more minutes). Then roll it into a long, even log—like a giant breadstick.
Step 5: Cut into Small Buns

Use a sharp knife to cut the log into 1-inch (or 2.5cm) pieces. Try to make them the same size so they steam evenly. If some are lopsided, don’t worry—just pat them into shape with your hands!
Step 6: Shape (Optional)

Want perfect round buns? Gently roll each piece between your palms. Or leave them as-is—they’ll still taste amazing. I’m lazy, so I usually skip this step, but if you’re feeling fancy, go for it!
Step 7: Get Creative with Shapes (Optional)

Feeling playful? Turn them into little animals or flower shapes! My niece loves when I make tiny rabbit buns—just pinch the top for ears. It’s a fun way to get kids excited about eating homemade food.
Step 8: Second Fermentation and Steaming

Put the buns on a steamer tray lined with parchment paper (so they don’t stick). Let them sit for 20 minutes—this is the second rise, and it makes them extra fluffy. Then, fill the steamer pot with water, bring it to a boil, and put the tray in. Steam on medium heat for 15 minutes. Important: Don’t open the lid right away! Let them sit for 5 minutes—otherwise, the sudden temperature change will make them collapse. Trust me, I’ve made that mistake before… sad, deflated buns are no fun.
Step 9: Enjoy Your Fresh Buns!

Open the lid, and boom—soft, white, milky buns! The smell alone will make your stomach growl. I could eat these plain, but they’re even better with a little butter or jam.
Step 10: Perfectly Portioned for Guilt-Free Snacking

These small buns are the perfect size—one bite is just enough, so you don’t feel guilty eating a few. I love that they’re not too big, so I can have two with my congee without overdoing it.
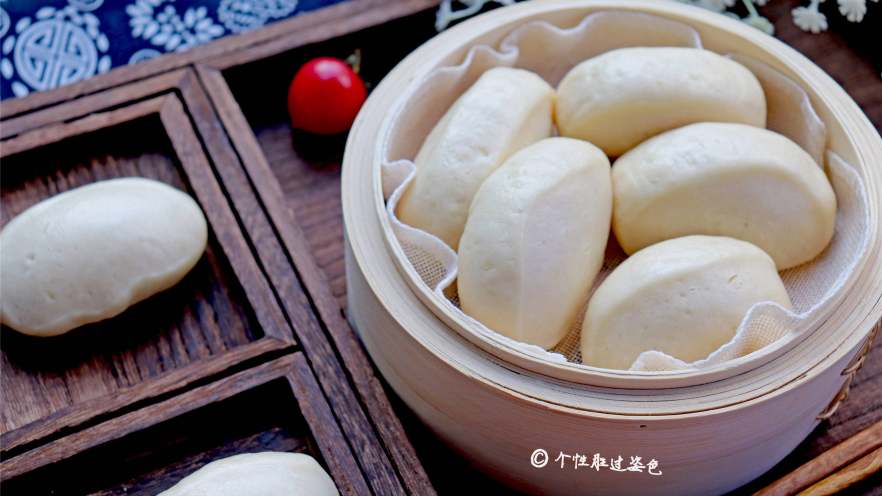
Step 11: Fluffy, Milky, and Irresistible

Look at these! They’re so white and plump—like little clouds. The milk gives them a subtle sweetness that’s not overpowering, and the texture is so soft it melts in your mouth.
Step 12: Fresh Out of the Steamer

I’ll admit it—sometimes I just eat a whole batch right after steaming. They’re that good! The warm, milky aroma is impossible to resist. No need for toppings—they’re delicious on their own.
Pro Tips for Perfect Steamed Buns
Here are some tricks I’ve learned over the years to make sure your buns turn out amazing every time:
- Freeze for later: Put cooled buns in a plastic bag, then into a sealed container, and freeze. When you want to eat them, just steam them for 5-10 minutes—they’ll taste fresh! They last up to 6 months, but I usually eat them within a month because they’re too good.
- Adjust water/milk: Different flours absorb liquid differently. If your dough is too sticky, add a little more flour. If it’s too dry, add a splash more milk. Go slow—you can always add more, but you can’t take it out!
- Sweetness is up to you: Don’t like sweet buns? Cut the sugar to 5g. Love sweet? Add 20g. It’s your call!
- Use the right flour: Medium-gluten flour is best for steamed buns (it’s what most “all-purpose” flour is in Asia). High-gluten is for bread, low-gluten for cakes. If you can’t find medium, all-purpose works fine!
- Check fermentation: The finger test is key! If the hole springs back, it’s not ready. If it collapses, it’s over-fermented. Practice makes perfect!
- Steaming time: Small buns take 15 minutes, bigger ones 20-25. Always wait 5 minutes before opening the lid—this is non-negotiable!
Final Thoughts
Making homemade milk steamed buns is easier than you think, and the payoff is huge. No more store-bought buns that are dry or flavorless—these are fresh, fluffy, and full of milky goodness. They’re perfect for breakfast, snack time, or even as a side with dinner. Give this recipe a try—you’ll never go back to plain buns again!
: Easy, Flavorful, and Nutritious One-Pan Meal")

 | Stir-Fried Broccoli with King Oyster Mushrooms")

")


