
")


Why This Xylitol Coconut Oil Pumpkin Bread Is My New Go-To Weekend Bake
Let’s be real—weekends are made for cozy kitchen projects, right? And lately, nothing’s hit the spot like this xylitol coconut oil pumpkin bread. It’s sweet, moist, and feels like a hug in a loaf… but without the guilt of traditional butter-and-sugar bakes. I swear, once you try it, you’ll be making it on repeat (my friends already beg for “that pumpkin bread” every time they visit).
What makes this recipe stand out? It swaps butter for coconut oil (hello, tropical vibes and skin-loving benefits!) and white sugar for xylitol (lower calories, no blood sugar spikes—win-win). Plus, the star ingredient? Pumpkin puree. It adds so much moisture and that warm, earthy flavor we all crave in fall (or let’s be honest, all year round). Let’s dive into how to make it!
Ingredients You’ll Need (No Fancy Stuff, Promise)
First things first: gather your ingredients. I kept this simple—no weird additives, just good stuff you probably already have (or can grab at the grocery store).
- 500g King Arthur high-gluten flour (trust me, this gives the bread that perfect chewy texture)
- 40g coconut oil (use unrefined for that extra coconutty kick!)
- 50g xylitol (it’s a natural sweetener—way better than processed sugar)
- 5g sea salt (don’t skip this! It balances the sweetness)
- 5g high-sugar-tolerant yeast (critical for fluffy bread—regular yeast might die in the sweet mix)
- 360g pumpkin puree (homemade is best, but store-bought works too if you’re short on time)
- 15g water (just enough to activate the yeast)
Pro tip: If you’re using store-bought pumpkin puree, make sure it’s 100% pumpkin—no added sugars or spices! That way, you control the flavor.
Step-by-Step: Let’s Bake This Bread!
Okay, let’s get to the fun part. This recipe is pretty straightforward, but I’ll walk you through each step so you don’t miss a beat.
1. Prep All Your Ingredients First

I’m a messy baker, so I’ve learned the hard way: prep everything before you start. Measure out your flour, coconut oil, xylitol, salt, and yeast. Having everything within reach saves so much stress (no running to the pantry mid-knead!).
2. Make Homemade Pumpkin Puree (It’s Easier Than You Think!)

Slice your pumpkin into thin strips (the thinner, the faster it cooks). Pop them in a steamer over boiling water and steam on high until they’re super soft—like, you can poke them with a fork and it goes right through. This takes about 10-15 minutes, depending on how thin you sliced.
3. Mash the Pumpkin & Let It Cool

Once the pumpkin is soft, transfer it to a bowl and mash it up with a spoon (or a potato masher if you want it extra smooth). Let it cool completely—warm pumpkin will kill the yeast, and we don’t want that!
4. Activate the Yeast

Take your 5g of yeast and mix it into 15g of warm water (not too hot—lukewarm is perfect, like bath water). Let it sit for 5-10 minutes until it gets foamy. That foam means the yeast is alive and ready to work its magic!
5. Knead Until You Get That “Window Pane”

Now, combine all your ingredients in a big bowl (or a stand mixer if you’re lucky—my arms get tired kneading by hand!). Mix everything together, then knead for 10-15 minutes until the dough is smooth and elastic. How do you know it’s ready? Do the “window pane test”: take a small piece of dough, stretch it thin—if it’s translucent (like a window) without tearing, you’re good to go.
6. First Rise: Let the Dough Grow!

Check the dough’s temperature—it should be between 23-25°C (73-77°F). If it’s too cold, warm it up a bit; too hot, let it cool. Then, put it in a greased bowl, cover it with plastic wrap, and let it rise in a proofing box (or a warm spot in your kitchen) at 29°C (84°F) with 60% humidity for 40 minutes.
7. Wait for It to Double in Size

After 40 minutes, take a peek. The dough should be puffy and double its original size. It’s like watching a magic trick—so satisfying!
8. Test the Rise (No Retraction = Success)

Stick your finger in the center of the dough. If the hole doesn’t retract (or only retracts a little), it’s ready. If it springs back immediately, it needs more time to rise.
9. Divide & Rest the Dough

Punch down the dough to release the air (this is my favorite part—so therapeutic!). Then, divide it into pieces: six 100g pieces and eight 40g pieces. Roll each piece into a smooth ball, cover them with plastic wrap, and let them rest for 20 minutes. This lets the gluten relax so it’s easier to shape later.
10. Prep the Cotton Strings (Yes, Cotton Strings!)

Cut 24 pieces of cotton string and soak them in vegetable oil. This prevents them from sticking to the bread when we bake it.
11. Shape the 100g Dough Balls (The “Cross” Trick)

Take each 100g dough ball, gently punch out any air, and roll it again. Lay four oiled cotton strings in a cross on a baking sheet, place the dough ball in the center, and tie the strings tightly (but not too tight—leave room for the dough to rise). Do this for all six 100g balls, then let them rise again at 36°C (97°F) with 70% humidity for 1 hour.
12. Shape the 40g Dough Balls (The “Ring” Method)

For the 40g balls: Grease an 8-inch round cake pan. Place a small cylindrical mold (like a clean can) in the center. Roll each 40g ball and arrange them around the mold, touching each other. Let them rise at 36°C (97°F) with 70% humidity for 1 hour—they’ll stick together and form a pretty ring!
13. Bake Until Golden & Delicious

Preheat your oven to 180°C (350°F). If you have a steam function (like my Haier T3 oven), use it—it keeps the bread moist and gives it a crispy crust. Bake for 18 minutes until the top is golden brown. My oven cooks evenly, but if yours has hot spots, rotate the pan halfway through.
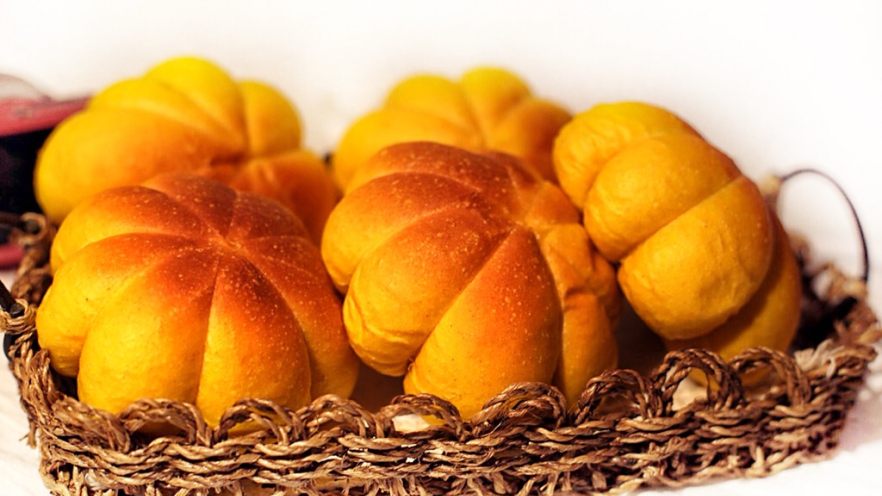
The Big Reveal: Is It Worth the Hype?

Oh. My. Goodness. When you pull these out of the oven, they smell like pumpkin spice heaven. The cross-shaped breads are so pretty—perfect for sharing! And the ring loaf? It’s like a fancy bakery treat, but you made it at home.
Let’s talk health benefits, too. Coconut oil isn’t just tasty—it’s packed with healthy fats that are great for your skin and can help lower cholesterol. Xylitol gives you that sweet fix without the calories of sugar, and pumpkin is alkaline, which helps detox your body and soothe your stomach. This bread isn’t just a snack—it’s a little self-care in every bite.
As I was baking this last weekend, I thought about my friend in Shanghai. It’s cold there right now, and I wanted to send her something warm and comforting. So I packed up a few loaves and mailed them off. Yeah, snail mail is slow, but that’s the point—good things take time, just like this bread. And hey, slow mail means more time to think about how much I care.
Final Tips for Baking Success
- Don’t rush the rising times! Patience is key for fluffy bread.
- If you don’t have a proofing box, use your oven: turn it on for 1 minute, turn it off, and place a bowl of hot water inside to create humidity.
- Store the bread in an airtight container at room temperature for up to 3 days, or freeze it for up to a month.
- Want extra flavor? Add a pinch of cinnamon or nutmeg to the dough—pumpkin and spices are BFFs.
So there you have it—my favorite xylitol coconut oil pumpkin bread recipe. It’s easy, healthy, and tastes like fall in every bite. Whether you’re baking for yourself, your family, or a friend far away, this bread is sure to bring a smile. Now go grab your ingredients and get baking—you won’t regret it!


