


Kimchi Egg and Chinese Sausage Fried Rice: Your New Go-To Quick Meal
Let’s be real—some nights, cooking feels like a chore. You’re tired, the fridge has random odds and ends, and you just want something tasty that doesn’t take an hour. Enter this kimchi egg and Chinese sausage fried rice: it’s fast, uses leftover rice (hello, zero food waste!), and packs so much flavor you’ll forget it’s a “lazy” meal. Even if you’re a total beginner (like, can barely boil water level), you’ve got this. Let’s dive in!
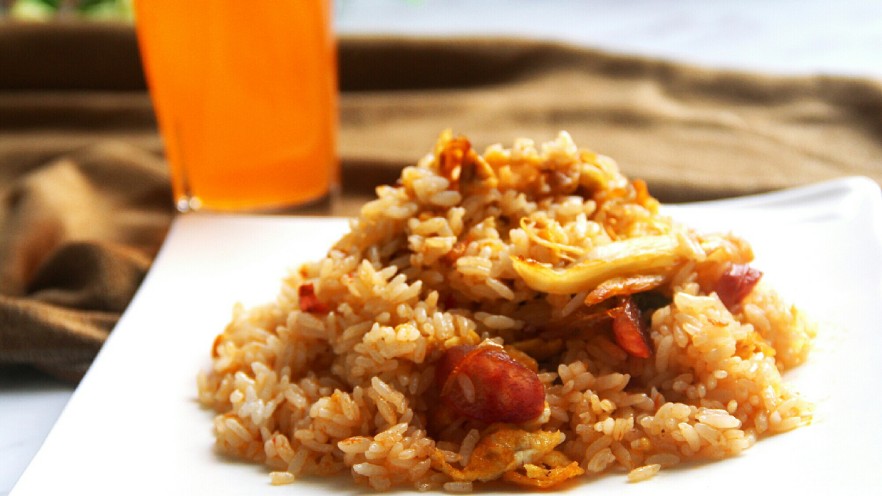
What You’ll Need (Super Simple Ingredients)
First, let’s round up your stuff. No fancy gadgets or weird ingredients here—just things you probably already have (or can grab from the corner store in 5 minutes):
- 1 bowl of leftover rice (cold rice works best, trust me—freshly cooked rice gets mushy!)
- 1 egg (large or medium, doesn’t matter)
- ½ Chinese sausage (lap cheong—those sweet, savory, slightly fatty links? Yes, that’s the one)
- A handful of kimchi (chop it up a bit if it’s in big chunks)
- 1 spoonful of salt (adjust to taste—kimchi is salty, so go easy at first!)
See? Told you it was simple. No complicated sauces or hard-to-find veggies. Just the good stuff.
Step-by-Step Instructions (With Pics!)
Now for the fun part—cooking! I’ve broken this down into 14 tiny steps so you don’t get lost. Follow along, and you’ll have a hot plate of fried rice in 15 minutes max.
Step 1: Gather Your Stars

First, grab your egg and that half sausage. Lay ’em out on the counter so you don’t have to rummage while the pan’s hot. Pro tip: Prepping everything first (called “mise en place”) saves you from panicking later.
Step 2: Kimchi Time

Take your kimchi and give it a quick chop if it’s too chunky. You want bite-sized pieces so every spoonful has that tangy kick. Don’t skip this—kimchi is the secret weapon here!
Step 3: Leftover Rice FTW

Dig out that bowl of leftover rice from last night’s takeout (or the rice you cooked yesterday and stuck in the fridge). Cold rice is key because it’s drier—no mushy clumps here. If it’s super clumpy, break it up with your hands before cooking.
Step 4: Crack the Egg

Crack your egg into a small bowl. No need to be fancy—just make sure there’s no shell in there (we’ve all been there, right?).
Step 5: Whisk It Up

Whisk the egg until the yolk and white are mixed. You don’t need to go crazy—just a few stirs will do. This makes sure your scrambled egg is nice and even.
Step 6: Slice the Sausage

Take your half Chinese sausage and slice it into thin rounds. The thinner, the better—they’ll cook faster and get a little crispy (yum).
Step 7: Heat the Oil

Pop a pan on the stove over medium heat. Pour in a little oil—don’t skimp! A bit of oil keeps everything from sticking and adds flavor. Wait until the oil shimmers (that means it’s hot).
Step 8: Cook the Egg

Pour the whisked egg into the pan. Let it sit for 10 seconds, then use a spatula to scramble it. Cook until it’s just set—don’t overcook it (dry eggs are no fun!). Once done, scoop it out and set it aside.
Step 9: Sauté the Sausage

Now, throw the sausage slices into the same pan (no need to clean it—more flavor!). Cook them for 2-3 minutes until they’re slightly browned and crispy around the edges. The fat from the sausage will make everything taste better—trust me.
Step 10: Add the Kimchi

Toss the chopped kimchi into the pan with the sausage. Stir it around for 1 minute—this wakes up the kimchi’s tangy, spicy flavor. You’ll start smelling it right away—so good!
Step 11: Bring in the Rice

Add your cold leftover rice to the pan. Use your spatula to break up any clumps and mix it with the sausage and kimchi. Make sure every grain of rice gets coated with that savory goodness.
Step 12: Season with Salt

Sprinkle in that spoonful of salt. Remember, kimchi is salty, so taste first! You can always add more, but you can’t take it out. Stir everything together.
Step 13: Mix in the Egg

Add the scrambled egg back into the pan. Stir everything one last time—you want the egg to be evenly distributed so every bite has a little egg, sausage, and kimchi.
Step 14: Dig In!

That’s it! Turn off the heat, scoop the fried rice into a bowl, and enjoy. It’s hot, savory, tangy, and so satisfying. I promise you’ll be going back for seconds.
Pro Tips to Make It Even Better
Okay, so this recipe is already easy, but here are a few little tricks to make it perfect every time:
- Use cold rice: Like I said earlier, fresh rice is too moist and will turn into a mushy mess. If you don’t have leftover rice, cook some and let it cool in the fridge for an hour.
- Don’t skimp on oil: A little extra oil keeps the rice from sticking and makes it crispy. Just don’t go overboard—you don’t want it to be greasy.
- Adjust the spice: If you love spicy food, add a pinch of red pepper flakes with the kimchi. If you’re not a fan, use mild kimchi.
- Add extra veggies: Want to make it healthier? Toss in some diced carrots, peas, or bell peppers when you add the kimchi. It adds color and crunch!
Why This Fried Rice Works (For Everyone)
Let’s be honest—fried rice is a classic for a reason. It’s versatile, uses up leftovers, and takes no time. But this version? It’s next level. The sweet, salty Chinese sausage pairs perfectly with the tangy kimchi, and the egg adds a creamy texture. It’s the kind of meal that feels comforting but also a little exciting (thanks, kimchi!).
And the best part? You don’t need to be a chef to make it. I’ve tested this recipe with my roommate who once burned toast, and even she nailed it. So if she can do it, you can too.
Final Thoughts
Next time you’re staring into the fridge wondering what to cook, give this kimchi egg and Chinese sausage fried rice a try. It’s quick, easy, and so delicious. You’ll save time, reduce food waste, and have a meal that tastes like it came from a restaurant (shhh, don’t tell anyone it’s homemade).
Now go grab your ingredients and get cooking—your taste buds will thank you!
")


")


