 Recipe for Lantern Festival")


: My Friend’s Request + 3 Easy Dishes You’ll Love")

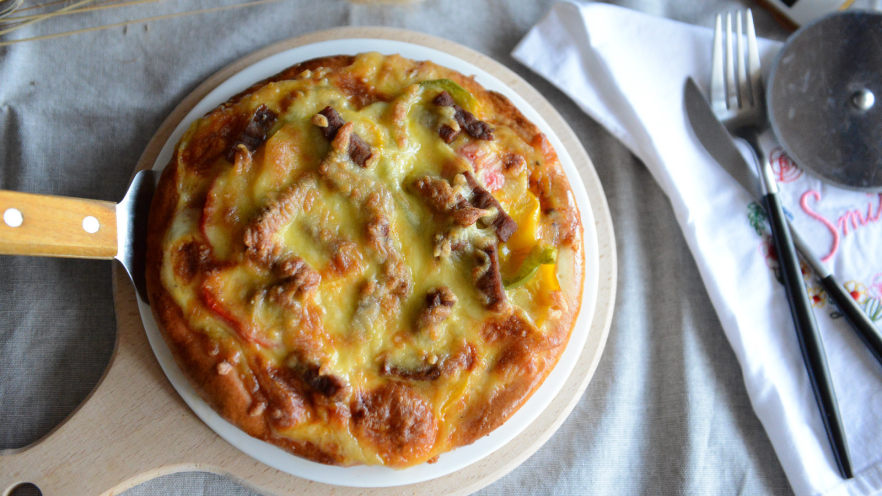
Why I Decided to Make Steak Pizza
Let me tell you about this genius idea I had last week. A while back, I went a little overboard at the grocery store and bought way too many steaks. My kids loved them at first—we had steak dinners, steak salads, even steak sandwiches—but by the end, that last lonely steak was just sitting in the fridge, ignored. I was this close to tossing it (gasp, the horror of food waste!), when I thought: Wait, why not turn it into pizza? My kids go crazy for pizza, so maybe this would be the perfect way to use up that leftover steak. Spoiler alert: It worked. Like, really worked. They ate two whole 8-inch pizzas and asked for more. So I’m sharing the recipe with you today—you’re welcome.
Ingredients You’ll Need
This recipe makes two 8-inch pizzas, which is perfect for a family of four (or two very hungry pizza lovers). Let’s break down the ingredients into two parts: the pizza crust and the toppings. No fancy stuff here—just regular kitchen ingredients you probably already have (except maybe the bread machine, but don’t worry, I’ll note alternatives later).
Pizza Crust Ingredients
- 200g high-gluten flour (this gives the crust that nice chewy texture—trust me)
- 40g egg (about half a large egg; save the other half for brushing the crust later!)
- 90g milk (I used whole milk for extra richness, but skim works too)
- 2g salt (just a pinch to balance the sweetness)
- 30g white sugar (not too much—just enough to feed the yeast)
- 2.5g high-sugar-tolerant yeast (critical if you want your crust to rise properly)
- 20g butter (unsalted is best so you control the salt)
Pizza Topping Ingredients
- 1/3 red bell pepper (adds a pop of color and sweetness)
- 1/3 green bell pepper (for that fresh, crisp taste)
- 1/3 yellow bell pepper (more color! More flavor!)
- 1/3 onion (I used a yellow onion, but red onion would be delicious too)
- 1/3 tomato (sliced thin—no mushy pizza here)
- 1 leftover steak (any cut works; I had a sirloin)
- Pinch of salt (for sautéing the veggies)
- Pizza sauce (store-bought is fine—no need to make it from scratch unless you want to)
- Shredded mozzarella cheese (the more, the merrier—this is what makes the pizza stretchy!)
Step-by-Step Instructions
Okay, let’s get cooking. I used my Dongling 1352AE-3C bread machine for the crust because kneading dough by hand is so last year. But if you don’t have a bread machine, you can knead it by hand for about 10 minutes until it’s smooth. Let’s go!
1. Make the Pizza Dough

First, toss all the pizza crust ingredients into your bread machine. Make sure to put the wet ingredients (egg, milk, butter) in first, then the dry ones (flour, sugar, salt, yeast). Then select the “pizza dough” setting and let it do its thing. This usually takes about 25 minutes—plenty of time to prep the toppings.
2. Prep the Toppings

While the bread machine is working, let’s get the toppings ready. Slice the onion, red bell pepper, yellow bell pepper, and green bell pepper into thin strips. Slice the tomato into thin rounds (you don’t want too much juice, so pat them dry a little if needed). Then cut the leftover steak into small strips—about 1-inch long. Easy peasy.
3. Sauté the Veggies and Steak

Heat a pan over medium heat (no oil needed—we’re just removing moisture). Toss in the bell pepper strips first—they take a little longer to cook.

Add a pinch of salt to draw out the moisture. Stir them around for a minute or two.

Don’t overcook them! We want them to be about 50% done—still crisp-tender. If you cook them all the way, they’ll turn mushy in the oven. Trust me, I’ve made that mistake before.

Now add the steak strips to the pan. Sauté them just until they’re heated through and slightly browned—since the steak is already cooked, you don’t need to cook it long.

Once done, transfer the veggies and steak to a plate and set them aside. Let them cool a little so they don’t make the pizza soggy.
4. Shape and Pre-Bake the Crust

After 25 minutes, the bread machine will beep—your dough is ready! It should be smooth and slightly puffy.

Take the dough out of the machine and give it a quick knead to release any air bubbles. Then divide it into two equal parts and roll each into a ball.

Take one dough ball and roll it out into a circle about the size of your 8-inch pizza pan. Don’t worry if it’s not perfect—pizza is supposed to be rustic!

Brush your pizza pan with a little oil to prevent sticking (even if it’s non-stick—better safe than sorry).

Place the rolled-out dough into the pan. Use your hands to press it out to the edges—make sure it covers the entire bottom.

Here’s a pro tip: Use a fork to poke holes all over the crust. This prevents it from puffing up like a balloon in the oven. I learned this the hard way—my first pizza crust had a huge bubble in the middle, and I had to pop it with a knife. Not cute.

Preheat your oven to 180°C (350°F). Once it’s hot, put the crust in and bake for 5 minutes. This is called “pre-baking” or “blind baking”—it makes the crust crispy on the bottom, so it doesn’t get soggy from the toppings.

Take the crust out of the oven and let it cool for a minute. Repeat this process with the second dough ball—you’ll have two pre-baked crusts ready to go.
5. Assemble and Bake the Pizza

Now the fun part: assembling the pizza! Take one pre-baked crust and place it on a baking sheet (or back in the pan).

Spread a thin layer of pizza sauce over the crust—don’t go overboard, or it will be soggy. I use about 2 tablespoons per pizza.

Sprinkle a layer of shredded mozzarella cheese over the sauce. This is the “glue” that holds everything together.

Add the sautéed veggies and steak strips on top. I like to spread them out evenly so every bite has a little bit of everything. Remember to pat the veggies dry if they have any extra moisture!

Sprinkle another layer of mozzarella cheese over the toppings. The more cheese, the better—am I right?

Brush the edges of the crust with a little egg wash (the leftover egg from the crust ingredients). This will make the crust golden brown and shiny—so pretty!

Preheat your oven to 190°C (375°F). Put the pizza in and bake for 20 minutes. Keep an eye on it—you want the cheese to be bubbly and the crust to be golden brown.

Take the pizza out of the oven and let it cool for 5 minutes before slicing. This is crucial—if you slice it right away, all the cheese will run off. Trust me, I’ve done that too.

Repeat the assembly process with the second crust, and you’ll have two delicious steak pizzas ready to eat!


Pro Tips for Perfect Steak Pizza
I learned a few things while making this pizza, so I’m passing them on to you to save you from my mistakes:
Crust Thickness Hack
I didn’t let the dough rise after shaping it—just rolled it out and baked it right away. This makes a thin, crispy crust that’s not too heavy. If you love thick, fluffy crust, let the shaped dough rise for 15 minutes before pre-baking. It’s all about personal preference!
Moisture Is the Enemy
Vegetables and steak can release a lot of moisture when baked, which makes the pizza soggy. Sautéing them first removes extra moisture—this is a non-negotiable step. Trust me, your pizza will thank you.
Store Extra Crusts
If you don’t want to make two pizzas at once, pre-bake both crusts, let them cool, wrap them in plastic wrap, and freeze them. When you’re ready to use one, just take it out of the freezer, add toppings, and bake. It’s a huge time-saver for busy weeknights.
Oven Temperature Matters
Every oven is different! My oven runs a little hot, so I had to turn it down to 185°C halfway through baking. Keep an eye on your pizza—if the crust is browning too fast, lower the temperature a little. If the cheese isn’t bubbly after 20 minutes, add a few more minutes.
Final Thoughts
This steak pizza is now a staple in my house. It’s a great way to use up leftover steak, and it’s so much better than takeout. My kids love it, and I love that it’s homemade with fresh ingredients. Plus, it’s easy to customize—add mushrooms, olives, or even pineapple if you’re into that (no judgment). Give it a try this weekend, and let me know how it turns out! I bet you’ll be hooked.

 at Home: A Step-by-Step Recipe Guide")


")

