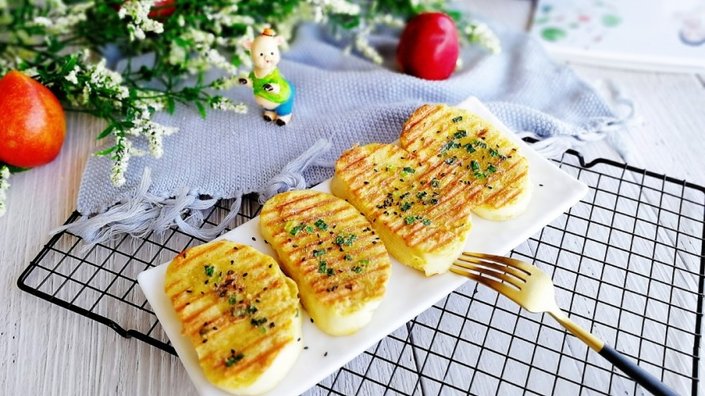
Easy Fluffy Chive Flower-Shaped Bread Recipe with Crispy Sausage

Let’s be real: nothing beats walking into a kitchen and smelling warm, fresh-baked bread wafting through the house. This chive flower-shaped bread with sausage is one of my go-to weekend baking projects — it’s fancy enough to bring to a potluck, easy enough for beginners, and the savory chive and sausage combo hits every single comfort food spot. I’ve been making this recipe for years, and even my pickiest roommate always asks for seconds. Let’s dive in!
What You’ll Need for This Chive Flower Bread
First things first: let’s list out all your ingredients so you don’t run to the pantry halfway through. I’ve broken this down into the main dough, fillings, and finishing touches to keep things simple.
Dough Ingredients
- 200g all-purpose flour (yes, that’s high-quality all-purpose, sometimes labeled bread flour adjacent works too!)
- 50g cake flour (this gives the bread that soft, fluffy crumb you love — skip this and just use 250g all-purpose if you don’t have cake flour on hand)
- 130g cold water (not too hot, you don’t want to kill the yeast!)
- 40g large egg (about 3/4 of a standard 60g egg, save the rest for brushing on top later!)
- 18g powdered milk (this boosts the flavor and keeps the bread soft longer — you can use instant milk powder no problem)
- 30g granulated sugar (just a touch to feed the yeast and add a subtle sweetness)
- 5g fine sea salt (don’t skip this! Salt balances the sweetness and makes the bread taste way more flavorful)
- 3g instant high-sugar yeast (if you’re using active dry yeast, you’ll need to activate it first in warm water with a pinch of sugar)
- 20g unsalted butter (softened slightly, not melted — this makes the dough super tender)
Extra Ingredients for Assembly
- 6 large breakfast sausages or cocktail frankfurters (I love using crispy smoked sausage for extra flavor)
- Fresh chives (chopped finely, about 2 tbsp worth)
- 1 extra large egg (for brushing on top of the bread before baking)
Step-by-Step Guide to Making Chive Flower-Shaped Bread
I know baking can feel intimidating at first, but I promise this recipe breaks down into super simple steps. I’ve even included photos to match each step so you can follow along easily!

Step 1: Mix the Base Dough
Pop all your dough ingredients except the butter into the bread machine bucket that came with your oven. If you don’t have a bread machine, you can just use a large mixing bowl and a stand mixer with a dough hook, or even mix by hand (it just takes a little more arm work!). Turn your oven’s bread dough setting on, or start mixing by hand until the ingredients come together into a shaggy ball.

Step 2: Knead the Dough to the Extended Stage
Run the dough mixer for 10 minutes straight, that’s one full cycle! After 10 minutes, check your dough: it should pull away from the sides of the bowl, but it’s still a little stretchy and not super smooth yet. Run the mixer for another 10 minutes (so 20 total) until the dough reaches the extended stage — you can pull a small piece thin without it tearing easily. Don’t worry if you’ve never heard of that before, this is just the point where your dough is ready to add butter!

Step 3: Add Butter and Finish Kneading
Now toss in your softened butter. Run the mixer for another 10 to 15 minutes, or knead by hand for 15 to 20 minutes until the dough is totally smooth and elastic. You’ll know it’s ready when you can pull a small piece of dough into a thin, transparent “window” without it breaking. This is called the full windowpane stage, and it’s perfect for soft dinner rolls and shaped breads like this one.

Step 4: First Fermentation (First Rise)
Cover the bread machine bucket or your mixing bowl tightly with plastic wrap. Turn on your oven’s proofing (fermentation) setting, and let the dough rise for 60 minutes. If your oven doesn’t have a proof setting, just turn the oven on to 100°F (38°C) for 2 minutes, then turn it off and put the dough inside. The perfect risen dough will be 2.5 to 3 times its original size, and if you poke a finger into it, the indentation won’t spring back.

Step 5: Shape the Dough Rolls
Punch the dough really hard to release all the trapped air! This might feel satisfying, go ahead and lean into it. Then transfer the dough to a clean, floured surface, and divide it evenly into 6 small balls. Cover those balls with a clean towel or plastic wrap, and let them rest for 15 minutes. This resting period makes the dough easier to roll out without it snapping back.

Step 6: Roll the Dough Into Long Thin Logs
Take one small dough ball and roll it out into a flat, oval shape. Take one of the narrow ends and roll it out even thinner — this will help you seal the dough later when we shape it. Now stretch the whole dough piece until it’s about 40cm (16 inches) long. If the dough snaps back while you’re stretching it, just set it down for 2 minutes and try again, it’ll relax right up!

Step 7: Shape the Flower Bread Loops
Take your long dough log and tie it into a loose knot. Now take the two ends of the knot and wrap them around each other to make a little flower shape, then pinch the ends together tightly so they don’t come undone while baking. Flip the shaped dough over so the sealed side is facing down on your baking tray. Repeat this with all 6 dough logs until you have 6 flower-shaped dough rings ready.

Step 8: Prep the Sausage Centers
Take each of your sausages and cut off about 1cm (1/2 inch) from one end. Then make 8 small cuts from the cut end down towards the uncut base, so it looks like a little star or flower. Don’t cut all the way through! Leave that 1cm base intact so the sausage stays together while it bakes. I always mess up the first one, so don’t stress if your first “m” cut looks messy — practice makes perfect!

Step 9: Add the Sausage to the Flower Bread
Take your star-cut sausage and push it into the center of your dough flower ring. The cut edges will fan out just like a real flower, which looks so cute when they bake up! I like to use a non-stick baking tray so I don’t have to line it with parchment paper, but if you don’t have one, just lay down a sheet of parchment to prevent sticking.

Step 10: Second Fermentation (Second Rise)
Cover your baking tray with plastic wrap, and put it back into your oven’s proofing setting. Add a small bowl of hot water to the oven to keep the air moist — this helps the dough rise nice and evenly. Let the bread rise for 40 minutes, until they’re doubled in size and feel light when you pick them up.

Step 11: Add the Finishing Touches
Take the risen bread loaves out of the oven, and preheat your oven to 180°C (350°F) for 10 minutes first. Crack open your extra egg and whisk it into a smooth egg wash. Brush every part of the dough and the sausage center with the egg wash — this will give your bread that perfect golden brown shiny crust! Now sprinkle the chopped fresh chives all around the sausage centers. Pro tip: if you don’t have fresh chives, dried chives work too, just use a little less since they’re more concentrated.

Step 12: Bake the Bread!
Pop the baking tray into the preheated oven, and bake for 17 minutes exactly. Keep an eye on them during the last 2 minutes if you have a glass oven door — you want them to be a deep golden brown, not burnt! Once they’re done, transfer them to a wire rack to cool for at least 5 minutes before serving. I promise the smell will be so strong that your family will beg you to cut into them early, but wait just a little longer so the inside sets properly!
Pro Tips for Perfect Chive Flower Bread Every Time
I’ve made my fair share of baking flops over the years, so let me share a few quick hacks to make sure your bread turns out perfect every single time:
- Check your oven temperature: Almost all home ovens have a slight temperature difference, so invest in a $10 oven thermometer to make sure you’re baking at the right heat. I once burned a whole batch of cookies because my oven was running 25°F too hot — total bummer!
- Adjust the dough if needed: If your dough feels too sticky, add a little extra flour. If it feels too dry, add a splash more water. Every kitchen is different, so don’t stress if your dough doesn’t match the recipe exactly at first.
- Use whatever bread recipe you love: This flower shape works with any basic bread dough! If you have a go-to dinner roll recipe, feel free to swap it in instead of this one. Just make sure the dough isn’t too wet, or the shape will get messy while rising.
- Store leftovers properly: Any leftover bread can be stored in an airtight container at room temperature for up to 3 days, or frozen for up to 3 months. Just pop them in the toaster oven for 5 minutes to crisp up the crust again!
Who Is This Recipe Perfect For?
This chive flower bread is such a versatile recipe! It’s perfect for:
- Weekend brunch with your friends — pair it with a simple green salad and some fresh fruit for a full meal
- Potlucks or backyard barbecues — everyone will ask you for the recipe!
- After-school snacks for kids — the sausage centers are a huge hit with little ones, and the chives add a healthy veggie twist
- Quick weeknight dinners — just pair the bread with a bowl of tomato soup for a cozy, comforting meal
I hope you love this recipe as much as I do! If you try it out, tag me in your photos — I’d love to see your perfectly shaped chive flower bread loaves. Happy baking!