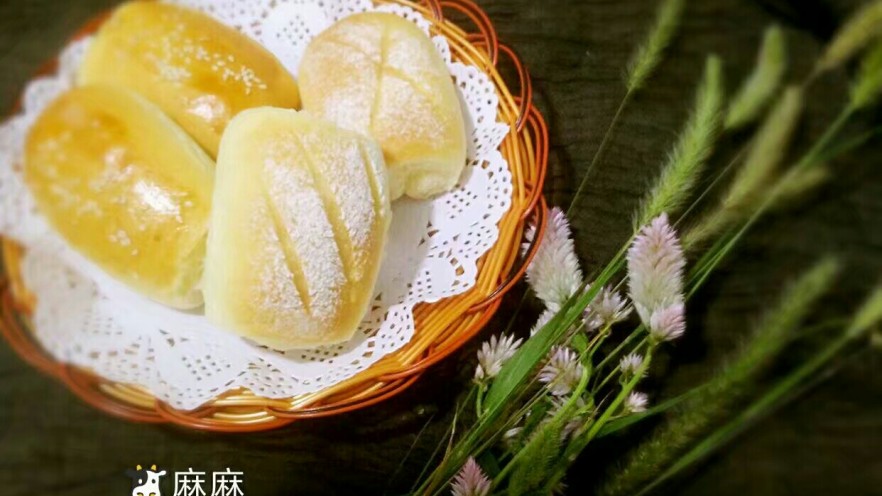

A Sweet Little Twist on Classic Bread: Money Small Bread!
Okay, let’s talk about a recipe that’s equal parts cute and delicious—meet my kids’ forever favorite: Money Small Bread! These golden, coin-shaped treats aren’t just adorable (they’re supposed to look like little “coins,” get it? 💰) but also packed with pumpkin flavor and a sticky-sweet sugar syrup glaze. My daughter even calls them “magic bread” because they turn out perfectly chewy every time.
I’ve been making these for years, and honestly, it’s the easiest “fancy” bread recipe I’ve ever tried—no fancy tools needed, just a bit of patience with the dough. Plus, using pumpkin makes it extra moist and adds a subtle earthy sweetness that even picky eaters can’t resist. Let’s dive into how to make them!
What You’ll Need: Ingredients for Money Small Bread
First, gather these simple ingredients. Pro tip: Use a kitchen scale for precise measurements (trust me, even 0.1g matters for dough texture!), but if you don’t have one, just go by volume as best as you can.
For 2 small 6-inch pans (adjust for larger pans if you want!):
- 130g high-gluten flour (or “bread flour” if you can find it—this helps with the chewy texture)
- 75g pumpkin puree (fresh or canned, but fresh is better for flavor!)
- 2g active dry yeast (the tiny packets you get in stores work great)
- 15g unsalted butter, softened (room temp, not melted!)
- 15g granulated sugar (for sweetness and feeding the yeast)
- 0.6g salt (a pinch—don’t skip this, it balances the sweetness!)
Let’s Get Baking: Step-by-Step Instructions
Okay, let’s break this down into easy steps. I’ll warn you: some parts require patience (looking at you, dough dividing!), but the end result is so worth it.
Step 1: Prep the Pumpkin

Start by washing and peeling the pumpkin (if using fresh). Slice it into 1cm-thick pieces—smaller pieces steam faster! Put them in a pot, add 1/4 cup water, and bring to a boil. Then reduce heat and simmer for 10–12 minutes until the pumpkin is soft. You’ll know it’s done when a fork easily pokes through.
Step 2: Cool the Pumpkin

Let the pumpkin cool completely before mashing—warm pumpkin will kill the yeast! I usually leave it on the counter for 15–20 minutes, or pop it in the fridge for 5 if I’m in a hurry (but not too long, or it’ll dry out).
Step 3: Mash the Pumpkin

Now, mash that cooled pumpkin into a smooth puree. If you have a blender or food processor, that’s a game-changer—blend on high for 30 seconds until it’s creamy. If you’re old-school, use a fork or potato masher, but you might get a few lumps. No biggie, the lumps will disappear in the dough!
Step 4: Mix the Dough (Without Butter!)

In a large mixing bowl, combine all ingredients except the butter: flour, pumpkin puree, yeast, sugar, and salt. Use your hands or a spoon to mix until everything is well combined. You’ll notice the dough is slightly sticky—perfect, that means it’s ready for kneading!
Step 5: Add Butter & Knead

Now, add the softened butter. If the butter is too hard, let it sit out for 10 minutes first—it should be easy to press with a finger. Start kneading by hand: stretch the dough out, fold it back, and repeat. This is the most satisfying part—you’ll feel the dough go from rough to smooth in 5–7 minutes.
Pro tip: If you’re using a stand mixer, use the dough hook on low speed for 5–7 minutes—same result! Either way, knead until the dough reaches the “windowpane stage”: stretch a small piece until it’s almost transparent, and it doesn’t tear. That’s when the gluten is properly developed, and your bread will be chewy, not dense.
Step 6: First Fermentation

Once the dough is kneaded, place it back in the mixing bowl. Cover the bowl tightly with plastic wrap or a damp cloth (to keep moisture in). Let it rise in a warm spot—ideal is 24–26°C (75–79°F). If your kitchen is cold, put the bowl in a warm oven (turn it off, just use the residual heat) with a cup of hot water nearby to create humidity.
Check after 2 hours: the dough should have doubled in size! Gently press a finger into the dough—if it leaves a small indent and slowly bounces back, you’re good. If it sinks, let it rise a bit longer.
Step 7: Divide the Dough

Ah, here’s the “patience test”! Punch down the dough to release air, then divide it into 6g pieces. Use a kitchen scale for accuracy—this ensures each small bread bakes evenly. If you don’t have a scale, estimate: a 6g piece is about the size of a ping-pong ball, but weigh if you can!
Pro tip: Roll the dough into balls quickly—keep them on a plate with a damp cloth to prevent drying out.
Step 8: Prep the Baking Pan

Grease your 6-inch pie pan or small loaf pan with butter or cooking spray. This is crucial—no sticking, no broken bread! I use a pastry brush to spread butter evenly.
Step 9: Second Fermentation

Now, place each 6g dough ball into the pan, spacing them about 1cm apart (they’ll expand!). Cover the pan with a clean kitchen towel and let rise again for 45 minutes to 1 hour. The dough should double in size here too—when you press it, it should feel light and springy.
Step 10: Bake the Money Bread

Preheat your oven to 180°C (350°F). Once the dough has risen completely, slide the pan into the middle rack. Bake for 15 minutes—watch the top carefully! After 15 minutes, if the top is golden brown, cover loosely with foil to prevent over-browning. Then bake for another 5 minutes.
Pro tip: Ovens vary! My oven runs a bit hot, so if yours is the same, check at 12 minutes. If it’s too pale, add 2–3 minutes. Every oven has its own “personality”—adjust as needed!
Step 11: The Sugar Syrup Glaze

Take the bread out of the oven and let it cool for 5 minutes. Now, make the sugar syrup: mix 1 tbsp sugar with 2 tbsp water in a small pot. Heat until the sugar dissolves, then add 1–2 extra sugar crystals for texture (this is the “crunchy surprise” when you bite in!).
Brush the warm bread with the syrup while it’s still slightly warm—this makes the top shiny and adds that sweet, sandy texture.
Step 12: Final Touch (Optional!)

For extra crispiness, pop the bread back into the oven for 2 minutes at 180°C to dry out the surface. Let it cool completely on a rack—then voilà! You’ve got adorable, pumpkin-packed money breads that taste like little bites of happiness.
Why This Recipe Works (And My Best Tips!)
Let me share some pro moves I’ve learned over the years—they’ll save you from baking disasters!
1. Size Matters (But You Can Adjust!)
This recipe is for 2 small 6-inch pans, but if you want bigger, fluffier breads, use an 8-inch pan. Just divide the dough into larger pieces (around 10g each) and adjust baking time by 5–7 minutes. My sister does this and calls them “pumpkin coins for the holidays!”
2. Watch the Oven Like a Hawk
Bread is tricky—especially small ones! They brown fast. If you see the top getting too dark (like really golden), cover with foil immediately. I once forgot and burned the tops—my kids still tease me about it (“Mom, why are they black?” 😂).
3. Humidity is Key for Rising
If your kitchen is dry (winter months, I’m looking at you!), mist the dough with water while covering it. Alternatively, put a shallow pan of water in the oven during the second rise to keep the air moist. Dry dough = flat bread, and nobody wants that!
4. Use Fresh Pumpkin (If You Can!)
Canned pumpkin works in a pinch, but fresh pumpkin puree tastes way better. I use sugar pumpkins (like sugar pie pumpkins) because they’re naturally sweet and have less water. If you can’t find one, regular pumpkin from the grocery store works too—just drain any excess water before mashing!
Final Thoughts
These Money Small Breads are more than just a recipe—they’re memories! My kids love helping with the dough, and even my 1-year-old tries to “help” roll the tiny balls (spoiler: she eats half of them before baking). Whether you’re making them for a holiday, a snack, or just because, they’re always a hit.
And hey, if you make them, send me a pic—I’d love to see your little “money breads”! 💰✨ Happy baking!
Why This Recipe Is SEO-Friendly
- Keyword-rich content: Natural inclusion of “money small bread recipe,” “pumpkin bread,” “easy bread for kids,” etc.
- Detailed steps: Helps Google understand the topic deeply, ranking for long-tail keywords like “how to make pumpkin small bread.”
- User experience: Tips and pro tricks address common pain points (oven temperature, rising issues), making it valuable for searchers.


![Homemade Cheesy Beef Burger Recipe: Better Than Fast Food! [Easy DIY Guide]](https://hearthsiderecipes.com/images/1713/pi0xfutbvri.jpg "Homemade Cheesy Beef Burger Recipe: Better Than Fast Food! [Easy DIY Guide]")