


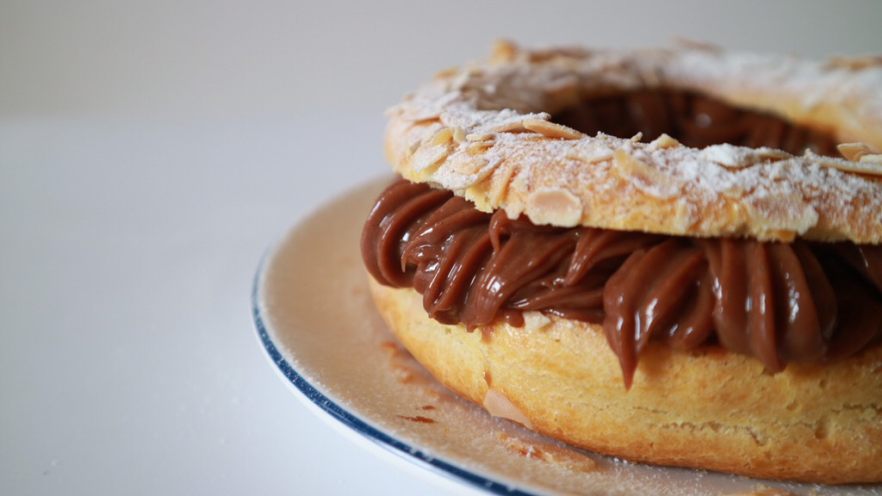
Let’s talk about the Paris-Brest—this classic French pastry is like a hug for your taste buds! Flaky choux pastry rings filled with creamy goodness? Yes, please. Today, I’m breaking down how to make it at home, with a Nutella twist that’s so worth the effort. Spoiler: It’s easier than you think, even if you’re new to baking. Let’s dive in!
What You’ll Need (For 2 Small 12cm Rings or 1 Large 18cm One)
First, let’s get our ingredients sorted. I’ve split them into three parts: the choux pastry (the “shell”), the vanilla custard (creamy base), and the fun stuff (filling and toppings). No fancy tools required—just basic kitchen gear!
Choux Pastry Ingredients
- 100g whole milk (full-fat works best for richness)
- 45g unsalted butter (cut into small cubes)
- A tiny pinch of salt (to balance sweetness)
- 60g all-purpose flour (sifted—trust me, this avoids lumps)
- 2 large eggs (60g+ each with shell; room temp is ideal)
Vanilla Custard (Crème Pâtissière) Ingredients
- 3 large egg yolks
- 50g granulated sugar
- 25g all-purpose flour (sifted)
- 250g whole milk
- A splash of vanilla bean paste (or extract—bean paste has better flavor!)
Filling & Topping Extras
- 80g Nutella (or hazelnut spread—halve this if you don’t love super chocolatey stuff)
- Fresh fruit (I used strawberries and blueberries—go wild with your faves!)
- Almond flakes (toasted for crunch)
- Powdered sugar (for that fancy dusted look)
Step 1: Make the Choux Pastry (The “Shell”)
Choux pastry is all about texture—light, airy, and crispy. Follow these steps closely, and you’ll nail it!

1. Grab a small saucepan and pour in the milk. Simple start, right?

2. Add the butter cubes. Let’s get that melting!

3. Toss in the pinch of salt. Don’t skip this—it makes the pastry taste less “flat.”

4. Heat the pan over medium until the butter melts and the milk starts to boil (bubbles around the edges). Then turn off the heat—important!

5. Sift the flour directly into the pan. Why sift? No lumpy pastry, that’s why.

6. Stir like crazy with a wooden spoon until it forms a smooth dough. Then turn the heat back to low and cook for 1-2 minutes—you’ll see a thin film on the bottom of the pan. This step is key to making the pastry rise later!

7. Transfer the dough to a mixing bowl. Let it cool for 5 minutes (you don’t want to cook the eggs!). Crack your two eggs into another bowl—make sure they’re big enough, or your dough might be too thick.

8. Whisk the eggs lightly—no need to beat them into a froth.

9. Add the eggs to the dough one tablespoon at a time, stirring well after each addition. Stop when the dough is thick enough to hang off the spoon in a “V” shape. Don’t overdo it—too much egg = soggy pastry!

10. Check the consistency: If it drips off the spoon quickly, add a little more egg. If it’s too stiff, add a tiny splash of milk. You’ve got this!

11. Spoon the dough into a piping bag (or a zip-top bag with the corner cut off). Pipe two 12cm rings (or one 18cm ring) onto a baking sheet lined with parchment paper. Pro tip: Trace circles on the paper first (underneath!) to get perfect shapes.

12. Pipe a second layer on top of the first ring—this makes it sturdier for filling. Brush the top lightly with egg wash (1 egg + 1 tsp milk) and sprinkle with almond flakes.

13. Pop it in the oven at 185°C (365°F) for 45 minutes. Do NOT open the oven door for the first 30 minutes—this is how you get that perfect rise! After 45 minutes, turn off the oven and leave the pastry inside for 10 minutes to crisp up. Trust me, this prevents it from deflating.

14. Let the pastry cool completely on a wire rack. Now, onto the custard!
Step 2: Make the Vanilla Custard (Crème Pâtissière)
This custard is the creamy heart of the Paris-Brest. It’s velvety, vanilla-y, and pairs so well with Nutella.

15. In a mixing bowl, whisk the egg yolks and sugar until pale and fluffy (about 2 minutes).

16. Sift the flour into the bowl and whisk until smooth—no lumps allowed!

17. Heat the milk and vanilla paste in a saucepan until it’s just about to boil (bubbles on the edge). Don’t let it boil hard—scorched milk is no fun.

18. Slowly pour the hot milk into the egg mixture, whisking constantly. This prevents the eggs from curdling (phew).

19. Pour everything back into the saucepan and cook over low heat, stirring nonstop with a wooden spoon. This takes patience—keep going until the custard thickens (it should coat the back of the spoon).

20. Once it’s thick, remove from heat and stir for 1 more minute to cool it slightly. Cover the surface with plastic wrap (to prevent a skin) and pop it in the fridge for at least 1 hour to chill.

21. When it’s cold, give the custard a quick whisk to make it smooth again. Now for the fun part… Nutella time!
Step 3: Assemble Your Paris-Brest
This is where it all comes together—get ready for some pastry magic!

22. Take the chilled custard and stir in the Nutella until it’s fully combined. If it’s too thick, add a tiny splash of milk to loosen it up.

23. Grab your cooled choux rings and slice each one horizontally into two halves (top and bottom).

24. Spoon the Nutella custard into a piping bag (or use a spoon—no judgment). Pipe a thick layer onto the bottom half of the ring.

25. Add your fresh fruit on top of the custard—strawberries, blueberries, raspberries… whatever makes you happy!

26. Pipe a little more custard over the fruit (optional, but extra creamy = extra delicious). Then place the top half of the choux ring back on.

27. Dust the top with powdered sugar for that fancy bakery look. Slice and serve immediately—this tastes best fresh!
Final Thoughts (And Pro Tips!)
Wasn’t that fun? The Paris-Brest is all about balance: crispy pastry, creamy filling, and a hint of chocolate. Here are a few last-minute tips to make it perfect:
- Don’t rush the choux pastry—cooking the dough properly is key to a flaky shell.
- If you don’t have Nutella, use hazelnut praline paste for a more traditional flavor.
- Make the custard a day ahead if you want to save time—just whisk it before using.
- Serve within 2 hours of assembling—choux pastry gets soggy if left out too long.
So there you have it—your very own homemade Paris-Brest with Nutella filling. Whether you’re making it for a special occasion or just because, it’s sure to impress. Let me know how yours turns out in the comments—I’d love to see your creations! Happy baking!


