


Three-Strand Braid Bread: A Perfect Blend of Beauty and Flavor
Let’s talk about three-strand braid bread—seriously, is there anything more satisfying than pulling a loaf of this out of the oven? The golden, twisted crust, the soft, pillowy inside, and that sweet, buttery aroma filling your kitchen? It’s pure magic. But here’s the thing: great braid bread doesn’t just happen by accident. You need two secret weapons (well, secret to some): a reliable oven and a bread machine that actually gets the job done. Lucky for me, I’ve got both! My Caso 960A Steam Convection Oven turns every bake into a masterpiece, and the Dongling 6D Bread Maker? Oh, it’s a game-changer. It kneads dough so well, it gives me that perfect “glove film” in 20 minutes flat—no more hand-kneading until my arms ache. Let’s dive into how to make this delicious bread!
Ingredients You’ll Need
First, let’s round up all the stuff you need. Don’t worry, it’s mostly basic baking supplies—nothing too fancy. Here’s the list:
- 200g high-gluten flour (this is key for that chewy texture!)
- 50g low-gluten flour (adds a bit of softness)
- 10g fresh yeast (trust me, fresh yeast makes the dough rise so much better)
- 16g milk powder (boosts that milky flavor)
- 40g milk (I use whole milk for extra richness)
- 78g water (warm, not hot—you don’t want to kill the yeast!)
- 45g granulated sugar (just enough sweetness)
- 15g condensed milk (adds a subtle caramel note)
- 30g whole egg liquid (save a little for later if you want, but this goes into the dough)
- 32g butter (unsalted, softened—this is where the flakiness comes from)
- 3g salt (balances out the sweetness)
- For the egg wash: 11g egg yolk + 22g milk (mix these together later)
- Almond slices (for topping—optional but so pretty!)
Step-by-Step Instructions
Okay, let’s get baking! I’ve broken this down into super easy steps, so even if you’re new to bread making, you’ve got this.
1. Knead the Dough with Your Bread Machine

First up: let’s let the bread machine do the hard work. Toss all the ingredients except the butter into the machine’s bowl. Make sure the wet ingredients (milk, water, egg) are at the bottom, then add the dry stuff (flour, sugar, salt). Pop the yeast on top—you don’t want it touching the salt directly, since salt can kill yeast. Then, start the kneading program and set it for 20 minutes. Sit back, relax, and let the machine do its thing!
2. Add Butter and Knead Until “Glove Film” Forms

After 10 minutes of kneading, stop the machine and check the dough. It should form a thick, slightly stretchy film when you pull it. That’s your cue to add the softened butter! Cut the butter into small pieces so it mixes in easily, then restart the kneading program. Keep going until the dough can stretch into a thin, transparent film without breaking—that’s the famous “glove film” bakers rave about. It might take a few extra minutes, but trust me, this step is what makes the bread super soft.
3. First Fermentation (Let the Dough Grow!)

Once you’ve got that perfect dough, shape it into a smooth ball and put it in a greased bowl. Cover it with plastic wrap (or a damp towel) and let it ferment. This is where the magic happens—yeast eats the sugar and produces gas, making the dough double in size. How long does it take? It depends on the temperature, but usually 1-2 hours. I like to put mine in a warm, draft-free spot (like inside the oven with the light on).
4. Check if Fermentation is Done

How do you know when it’s ready? Take a floured finger and poke the dough gently. If the hole doesn’t collapse or spring back right away, you’re good to go! If it collapses, it’s over-fermented. If it springs back quickly, it needs more time. Don’t stress—this is easier than it sounds!
5. Divide and Rest the Dough

Now, punch down the dough to release the gas (this is so satisfying!). Divide it into 6 equal parts, then divide each of those into 3 smaller parts—so you have 18 tiny dough balls total. Cover them with plastic wrap and let them rest for 20 minutes. This step is called “bench rest” and it helps the gluten relax, so the dough is easier to shape later.
6. Shape the Dough into Long Strands

After resting, take 3 small dough balls and roll each one into a long, thin strand—about 30-40 cm long. Try to make them as even as possible, but don’t worry if they’re a little lumpy. It’s homemade, after all!
7. Braid the Strands Together

Now for the fun part: braiding! Gather the 3 strands at one end and pinch them together. Then, cross the right strand over the middle one, then the left strand over the new middle one. Keep doing this until you reach the end, then pinch the strands together to seal. Repeat this with the remaining dough balls until you have 6 braids (since we divided the dough into 18 parts—3 per braid). Place the braids on a baking sheet lined with parchment paper.
8. Second Fermentation (Let the Braids Puff Up)

Now, it’s time for the second fermentation. Pop the baking sheet into your oven (use the fermentation function if you have it—set to 38°C) and let the braids rise for about 50 minutes. They should double in size and look fluffy. If your oven doesn’t have a fermentation function, you can put a bowl of hot water inside to create humidity—this helps the dough rise evenly.
9. Make the Egg Wash

While the braids are fermenting, make the egg wash. Mix the egg yolk and milk together until smooth, then strain it through a fine sieve to get rid of any lumps. Pour it into a spray bottle—this makes it easier to apply evenly later. If you don’t have a spray bottle, a brush works too!
10. Preheat the Oven

Once the braids are done fermenting, take them out of the oven and preheat it to 170°C (340°F). This gives the oven time to reach the right temperature—important for even baking!
11. Apply the Egg Wash

Spray (or brush) the egg wash evenly over the top of each braid. This is what gives the bread that beautiful golden color. Don’t skip this step—it makes a huge difference in how the bread looks!
12. Add Almond Slices (Optional but Pretty)

Sprinkle some almond slices on top of the braids for extra crunch and a fancy touch. You can also use sesame seeds or poppy seeds if you prefer—get creative!
13. Bake Until Golden Brown

Pop the baking sheet into the preheated oven and bake for 15-18 minutes. Keep an eye on it—every oven is different! The bread is done when it’s a deep golden brown and sounds hollow when you tap the bottom.
14. Cool and Store

As soon as the bread comes out of the oven, transfer it to a wire rack to cool completely. Don’t put it in a container while it’s still warm—this will make it soggy. Once it’s cool, store it in an airtight container to keep it fresh. It’s best eaten within 2-3 days, but let’s be real—this bread won’t last that long!
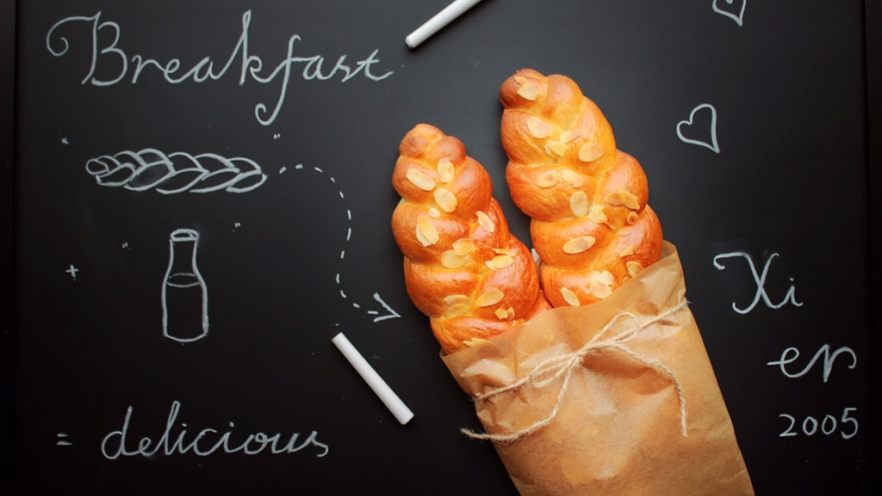
15. A Little Photo Fun

I couldn’t resist taking some photos of the finished bread—look how pretty it is! The braids are so neat, and the golden crust is just perfect. I tried a new photo style today, with a rustic background and some fresh berries—what do you think?
16. Enjoy Your Soft, Delicious Bread!

Finally, the best part: slicing into the bread and taking that first bite. It’s so soft and fluffy, with a hint of sweetness from the condensed milk. The almond slices add a nice crunch, and the braided shape makes it feel special—perfect for breakfast, snacks, or even as a side for soup. I hope you love this recipe as much as I do!
Final Tips for Success
Before I go, here are a few quick tips to make sure your braid bread turns out perfect every time:
- Use fresh yeast if you can—it makes the dough rise faster and taste better.
- Don’t skip the “glove film” step—this is what makes the bread super soft.
- Make sure the dough is at room temperature before kneading—cold dough is harder to work with.
- If you don’t have a bread machine, you can knead by hand—just be prepared to knead for 20-30 minutes.
- Experiment with toppings! Try sesame seeds, poppy seeds, or even chocolate chips for a sweet twist.
That’s it! I hope you give this three-strand braid bread recipe a try. It’s easier than it looks, and the results are so worth it. Let me know in the comments if you make it— I’d love to see your creations!


 with Direct Dough Method")

 – Crispy, Juicy, No Oven Required!")

