

 & Red Dates Pork Bone Soup Recipe | Nourishing Chinese Wellness Dish")

")
Why Homemade Crispy Chicken Strips Are a Game-Changer
Let’s be real—who doesn’t crave crispy, golden chicken strips every now and then? That satisfying crunch when you bite into them, the juicy meat inside… it’s pure comfort food. But let’s talk about takeout versions: sometimes they’re greasy, sometimes the chicken is dry, and you never really know what’s in the batter. That’s why I started making my own crispy chicken strips at home. Not only are they way cleaner and healthier (no mystery ingredients!), but they’re also super easy to whip up. Plus, you can customize the seasonings to your taste. Trust me, once you try this recipe, you’ll never go back to store-bought or takeout again.
Ingredients You’ll Need
First things first—let’s gather the stuff. You don’t need any fancy gadgets or hard-to-find ingredients here. Just basic kitchen staples:
- 100g chicken breast (boneless, skinless—this is the star of the show!)
- Enough breadcrumbs (panko works best for extra crunch, but regular is fine too)
- 1 egg (we’ll use both yolk and white, so no waste!)
- 1 teaspoon salt (to bring out the flavor)
- 1 teaspoon black pepper (for a little kick)
- 1 teaspoon cooking wine (this helps tenderize the chicken and get rid of any gamey taste)
See? Simple, right? Now let’s get cooking.
Step-by-Step Instructions for Perfect Crispy Chicken Strips
Follow these steps, and you’ll have perfect chicken strips every time. I’ve broken it down with photos so you can visualize each part—no guesswork!
Step 1: Prep the Breadcrumbs

First, grab your breadcrumbs and put them in a shallow bowl or plate. Make sure it’s big enough to roll the chicken strips in later. I like to use panko because it’s lighter and crispier, but if you only have regular breadcrumbs, that’s totally okay.
Step 2: Clean the Chicken Breast

Take your chicken breast and rinse it under cold water. Pat it dry with a paper towel—this is important because dry chicken absorbs seasonings better and gets crispier when fried. No one wants soggy chicken strips!
Step 3: Pound the Chicken

Now, take the back of a knife (or a meat mallet if you have one) and gently pound the chicken breast. This helps tenderize the meat so it’s not tough. Don’t pound it too thin—we want it to stay juicy inside. Just flatten it a little so it cooks evenly.
Step 4: Cut Into Strips

Once the chicken is pounded, cut it into strips. Aim for strips that are about 1-2 inches wide—perfect for holding and dipping. If they’re too big, they might not cook through; too small, and they’ll get too crispy (or burn!).
Step 5: Separate the Egg

Take your egg and crack it into two bowls: one for the egg white and one for the egg yolk. Why separate them? The egg white helps marinate the chicken and keep it juicy, while the yolk acts as a binder for the breadcrumbs. Clever, right?
Step 6: Add Egg White to Chicken

Pour the egg white over the chicken strips. Give them a little toss so every strip is coated. This is the first step to keeping the chicken moist—no dry meat here!
Step 7: Season with Salt

Add 1 teaspoon of salt to the chicken strips. Don’t skip this—salt is the foundation of flavor. Just make sure you don’t overdo it; we’ll add more seasonings in a minute.
Step 8: Add Black Pepper

Next up: 1 teaspoon of black pepper. This adds a subtle warmth and depth to the chicken. If you like a little extra heat, you can add a pinch of cayenne pepper too—totally optional!
Step 9: Add Cooking Wine

Now, pour in 1 teaspoon of cooking wine. This is a secret trick to tenderize the chicken and remove any unpleasant “chickeny” smell. Don’t worry, the alcohol cooks off, so it’s kid-friendly!
Step 10: Marinate for 30 Minutes

Mix everything together well, then let the chicken marinate for at least 30 minutes. This is non-negotiable! Marinating gives the seasonings time to sink into the meat, making it flavorful from the inside out. You can even marinate it for an hour if you have more time—just don’t go over 2 hours, or the chicken might get too soft.
Step 11: Beat the Egg Yolk

While the chicken is marinating, take the egg yolk you set aside earlier and beat it with a fork until it’s smooth. This will be our “glue” for the breadcrumbs—without it, the crumbs won’t stick to the chicken.
Step 12: Coat Chicken in Egg Yolk

Once the chicken is done marinating, pour the beaten egg yolk over the strips. Toss them gently so every strip is coated. This step is key for that crispy outer layer—don’t skip it!
Step 13: Mix Well

Give the chicken strips a good mix to make sure each one is evenly coated with the egg yolk. You want every inch covered so the breadcrumbs stick perfectly.
Step 14: Roll in Breadcrumbs

Now, take each chicken strip and roll it in the breadcrumbs. Press the crumbs onto the chicken gently—this helps them adhere better. Make sure the entire strip is covered; no bare spots allowed! The more breadcrumbs, the crunchier the final product.
Step 15: Arrange Coated Strips

Once all the strips are coated, arrange them on a plate. Don’t stack them—if they touch, the breadcrumbs might come off. Let them sit for 5 minutes so the breadcrumbs set a little.
Step 16: Heat the Oil

Time to fry! Pour enough oil into a pan (about 1-2 inches deep) and heat it over medium-low heat. How do you know the oil is ready? Drop a tiny piece of breadcrumb into it—if it sizzles and floats to the top, it’s good to go. Important: don’t use high heat! If the oil is too hot, the outside will burn before the inside is cooked.
Step 17: Fry Until Golden Brown

Carefully place the chicken strips into the hot oil (don’t overcrowd the pan—fry in batches if needed). Fry them for about 3-4 minutes on each side, or until they’re golden brown and crispy. Keep an eye on them—since we’re using low heat, they won’t burn quickly, but it’s still good to check.
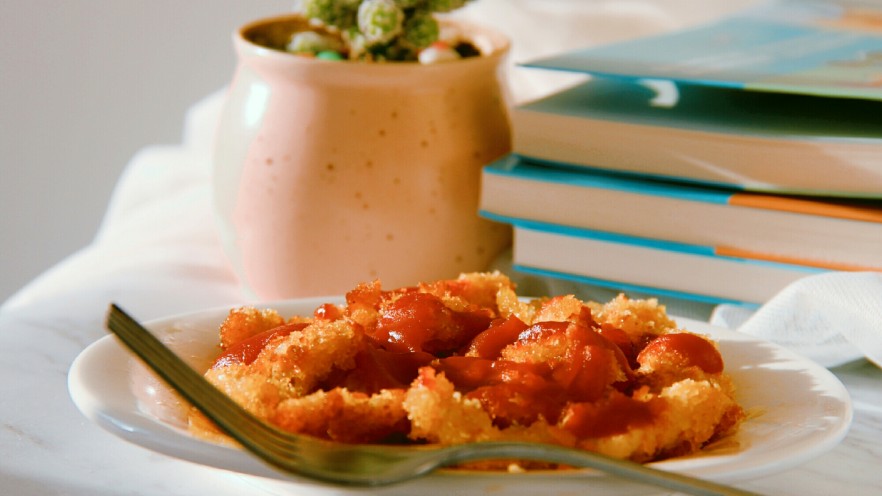
Step 18: Serve and Enjoy!

Once the chicken strips are done, take them out with a slotted spoon and place them on a paper towel to drain any excess oil. Then, serve them with your favorite dipping sauce—ketchup, BBQ sauce, honey mustard, or even ranch. They’re perfect as a snack, a side dish, or even a main course with some fries and veggies. Trust me, the crunch and juiciness will make you want to make these every weekend!
Pro Tips for Perfect Crispy Chicken Strips Every Time
Before you go, here are a few extra tips to make sure your chicken strips turn out amazing:
- Use low heat when frying: This is the most important tip! High heat will burn the outside and leave the inside raw. Low heat ensures the chicken cooks through and the breadcrumbs stay crispy.
- Don’t skip the marination: Marinating the chicken for at least 30 minutes is key to juicy, flavorful meat. If you’re short on time, 15 minutes is better than nothing, but 30 is ideal.
- Use panko breadcrumbs: Panko is lighter and crispier than regular breadcrumbs, so it gives the chicken strips that perfect crunch. If you don’t have panko, you can make your own by toasting bread and blending it into crumbs.
- Pat the chicken dry: Moisture is the enemy of crispiness. Make sure to pat the chicken breast dry before cutting it into strips—this helps the seasonings and egg stick better.
Final Thoughts
Making homemade crispy chicken strips is easier than you think, and the results are so worth it. They’re perfect for a quick snack, a kid-friendly meal, or even a party appetizer. Plus, you can feel good about what’s in them—no hidden preservatives or greasy oils. So next time you’re craving chicken strips, skip the takeout and try this recipe. I promise you won’t be disappointed!


 – Easy, Nutritious Homemade Bread Recipe")

 at Home: A Step-by-Step Recipe Guide")


 Recipe – Tried & True!")
