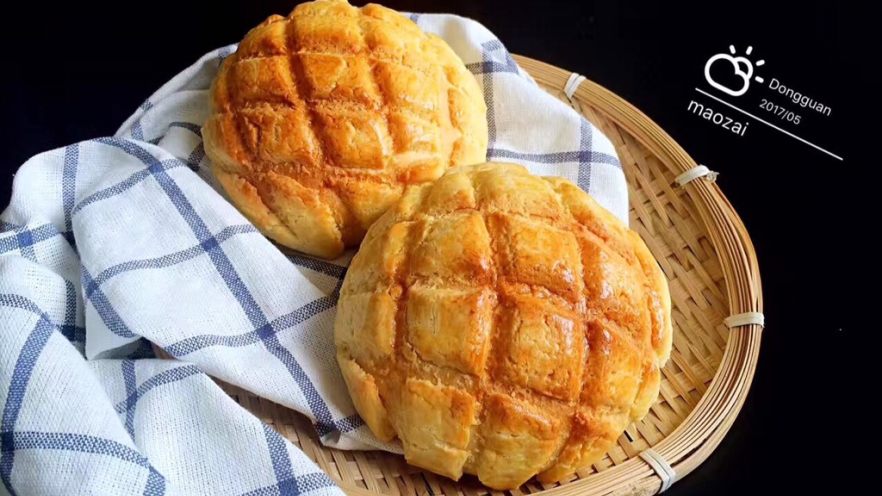

Why I Ditched Store-Bought Pineapple Buns for Homemade
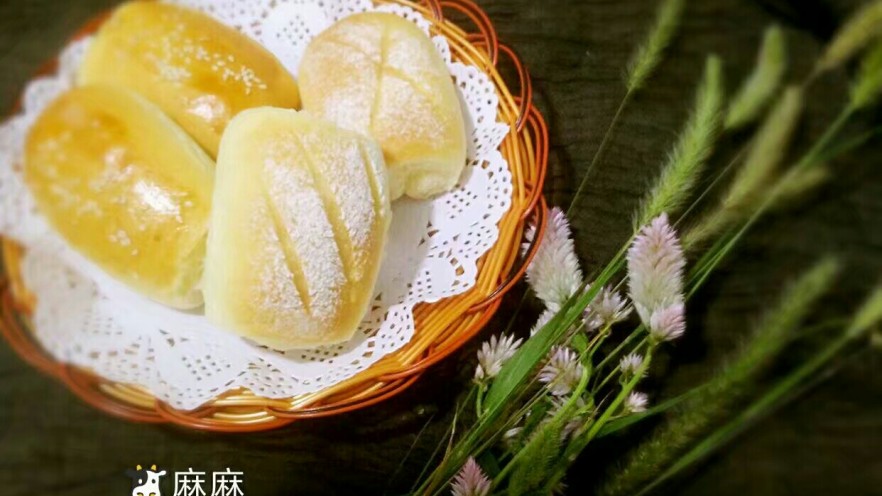
Before I got into baking, I was obsessed with this one local bakery’s pineapple buns. Like, obsessed. I’d load up my loyalty card with $50+ at a time, and it’d be gone in a week—no joke. That crispy, buttery top paired with the soft bread? Chef’s kiss. But then I thought, “Wait, can I make these at home?” Spoiler: Yes. And let me tell you—my homemade version blows the store-bought ones out of the water.
Oh, and don’t get me started on the “pineapple buns have no pineapple” debate. I laugh every time I hear that. So for my recipe? I stuffed mine with actual pineapple filling. Next time someone says that nonsense, I’m pulling out one of these bad boys and proving them wrong. Homemade = you call the shots. Extra filling? Yes. Crispier top? Done. No skimping here.
Ingredients You’ll Need
Let’s break this down into three parts: the soft bread dough, the iconic crispy pineapple top, and (of course) the pineapple filling. Pro tip: Measure everything out first—nothing kills a baking vibe like rummaging for sugar mid-step.
Bread Dough Ingredients
- 360g high-gluten flour (this gives the dough that chewy texture we love)
- 18g milk powder (adds a subtle creamy flavor)
- 50g granulated sugar (just enough sweetness)
- 1 large egg (about 51g—save the yolk for later if you want, but whole egg works too)
- 205ml milk (warm it slightly if your kitchen is cold—helps the yeast wake up)
- 4g active dry yeast (don’t skip this! It makes the dough rise)
- 25g unsalted butter (softened, not melted—this is key for a smooth dough)
- 3g fine salt (balances the sweetness)
Pineapple Top (Crust) Ingredients
- 50g unsalted butter (softened to room temp—trust me, it’s easier to mix)
- 165g low-gluten flour (low-gluten = flakier, crispier top)
- 10g milk powder (more creaminess!)
- 45g granulated sugar (sweet but not overpowering)
- 1 large egg (about 55g—this binds everything together)
- 1g fine salt (again, balance is everything)
Filling
- 240g pineapple filling (you can buy this pre-made or make your own—store-bought is totally fine for a quick bake)
Step-by-Step Pineapple Bun Recipe
Ready to get baking? Let’s go. I’ve included photos for each step to make it easy—no guesswork here.
1. Make the Bread Dough

First, grab your bread machine (or a stand mixer—hand kneading works too, but it’s a workout). Add the milk, egg, sugar, flour, milk powder, and yeast to the machine first (liquid first = no dry spots). Run the dough kneading program for 10 minutes.
After 10 minutes, toss in the softened butter and salt. Knead for another 20 minutes. Why the wait? The butter needs time to mix in without melting, and the salt shouldn’t touch the yeast directly (it can kill it).
2. Check the Gluten Development (Gluten Window Test)

Take a small piece of dough and stretch it gently. If it forms a thin, elastic “glove membrane” that doesn’t break easily (or if it does break, the edge is smooth), you’re good. If it tears right away? Keep kneading for 5 more minutes.
Once the dough is ready, put it back in the bread machine and run the fermentation program. Let it rise until it’s 2-2.5 times bigger—this usually takes 40-60 minutes (my kitchen was warm, so it took 40 minutes). To check: poke it with a finger. If the indentation stays, it’s done.
3. Prep the Pineapple Filling

While the dough rises, divide the pineapple filling into 8 equal parts (30g each). Roll each into a small ball and set them aside. This saves time later—no rushing when the dough is ready.
4. Make the Crispy Pineapple Top

About 10 minutes before the dough finishes rising, start on the top. Take the softened butter, sugar, and salt and mix them together until smooth (no lumps!).

Next, add the egg—but do this in 3 parts! If you pour it all in at once, the butter and egg will separate (gross). Mix well after each addition until it’s light and fluffy.

Now add the low-gluten flour and milk powder. Mix until there are no dry spots—don’t overmix, though! You want it to be crumbly but still hold together.

Divide the top mixture into 8 equal parts (same as the filling) and roll them into balls. Set these aside too.
5. Assemble the Buns

Once the dough is fermented, punch it down gently to release the air. Divide it into 8 equal pieces (about 80g each) and roll each into a smooth ball.

Take one dough ball, flatten it with your palm, and place a pineapple filling ball in the center. Pinch the edges of the dough together to seal the filling—make sure it’s tight so the filling doesn’t leak out while baking.

Now take a pineapple top ball and flatten it into a thin circle (about 5mm thick). Place it over the filled dough ball and gently press it down to stick. Don’t worry if it cracks a little—cracks make it look rustic!

Use a small knife or scraper to cut crisscross lines on the top (like a pineapple!). This helps it expand evenly while baking.

6. Second Fermentation (Final Rise)

Place the assembled buns on a baking sheet lined with parchment paper. Let them rise again (second fermentation) until they’re 1.5 times bigger. The ideal temp is 30-38°C (86-100°F) with 75-85% humidity. If your kitchen is dry, cover them with a damp cloth.
7. Bake the Buns
Preheat your oven to 185°C (365°F) for 10 minutes. Once the buns are fermented, brush the tops with a little egg wash (optional—but it makes them shiny and golden).
Bake them on the middle rack for 25 minutes. Keep an eye on them after 20 minutes—if they’re getting too dark, cover them with aluminum foil. Every oven is different, so adjust the time if needed.
8. Enjoy!

Take them out of the oven and let them cool for 5 minutes (they’re super hot inside!). Then take a bite—crispy top, soft bread, and sweet pineapple filling. Trust me, this is way better than any store-bought bun.
Pro Tips for Perfect Pineapple Buns
- Oven Temperature: Every oven has a “personality”—mine runs hot, so I lower the temp by 10°C. Test yours and adjust!
- Flour Absorption: Different flours absorb liquid differently. If your dough is too sticky, add 5g more flour. If it’s too dry, add 5ml more milk.
- Pineapple Top Mixing: Don’t rush adding the egg! Separated butter = sad, crumbly top. Take your time.
- Fermentation: If your dough isn’t rising, check the yeast (is it expired?) or the room temp (too cold?). Warm it up a little and try again.

![Homemade Cheesy Beef Burger Recipe: Better Than Fast Food! [Easy DIY Guide]](https://hearthsiderecipes.com/images/1713/pi0xfutbvri.jpg "Homemade Cheesy Beef Burger Recipe: Better Than Fast Food! [Easy DIY Guide]")